Activation-Triggered Flows
Introduction
An activation-triggered flow runs when an activation is published. When an individual qualifies for a segment, the activation can pass the individual’s record and selected attributes from related data model objects to the flow. The flow can use those attributes to personalize an email.
The segment’s publishing schedule determines when records are passed to the flow. Depending on the segment configuration, incremental refreshes can run as often as every 10 minutes, while standard refreshes can run every 24 hours. You can also refresh the segment manually.
In this workshop, you’ll build an activation-triggered flow that sends a personalized back-in-stock email to customers who signed up to be notified when a product becomes available again.
Create Sample Data File
In this exercise, you’ll create a sample data file that simulates back-in-stock alert records from an ecommerce platform.
- Open the Marketing app from App Launcher
(with a gray icon). - Select the Contacts tab.
- Open any contact record.
- Copy the 18 digit record id (prefixed with
003) from the page URL and paste it into a text editor. - Repeat steps 3-4 for two other Contact records.
- Copy the sample data file below and paste into a text editor, then replace the
INSERT_IDplaceholder values with the record id values you copied previously.
RegistrationId,ProductSku,IndividualId
717b9b29,2010517,INSERT_ID
378a86c4,2010565,INSERT_ID
0ef251bf,2010904,INSERT_ID- Save the text file with a
.csvfile extension.
Create Data Streams
In the following exercises, you’ll create two data streams. The first simulates ingesting back-in-stock alert requests from an ecommerce platform and maps them to a custom DMO. The second ingests a product catalog and maps its records to the Goods Product DMO.
Back-in-Stock Alerts Data Stream
- Open the Data Cloud app from App Launcher
. - Select the Data Streams tab, then click New.
- Select the File Upload tile, then click Next.
- Click
Upload Files and choose the CSV file you saved in the previous exercise. - Enter
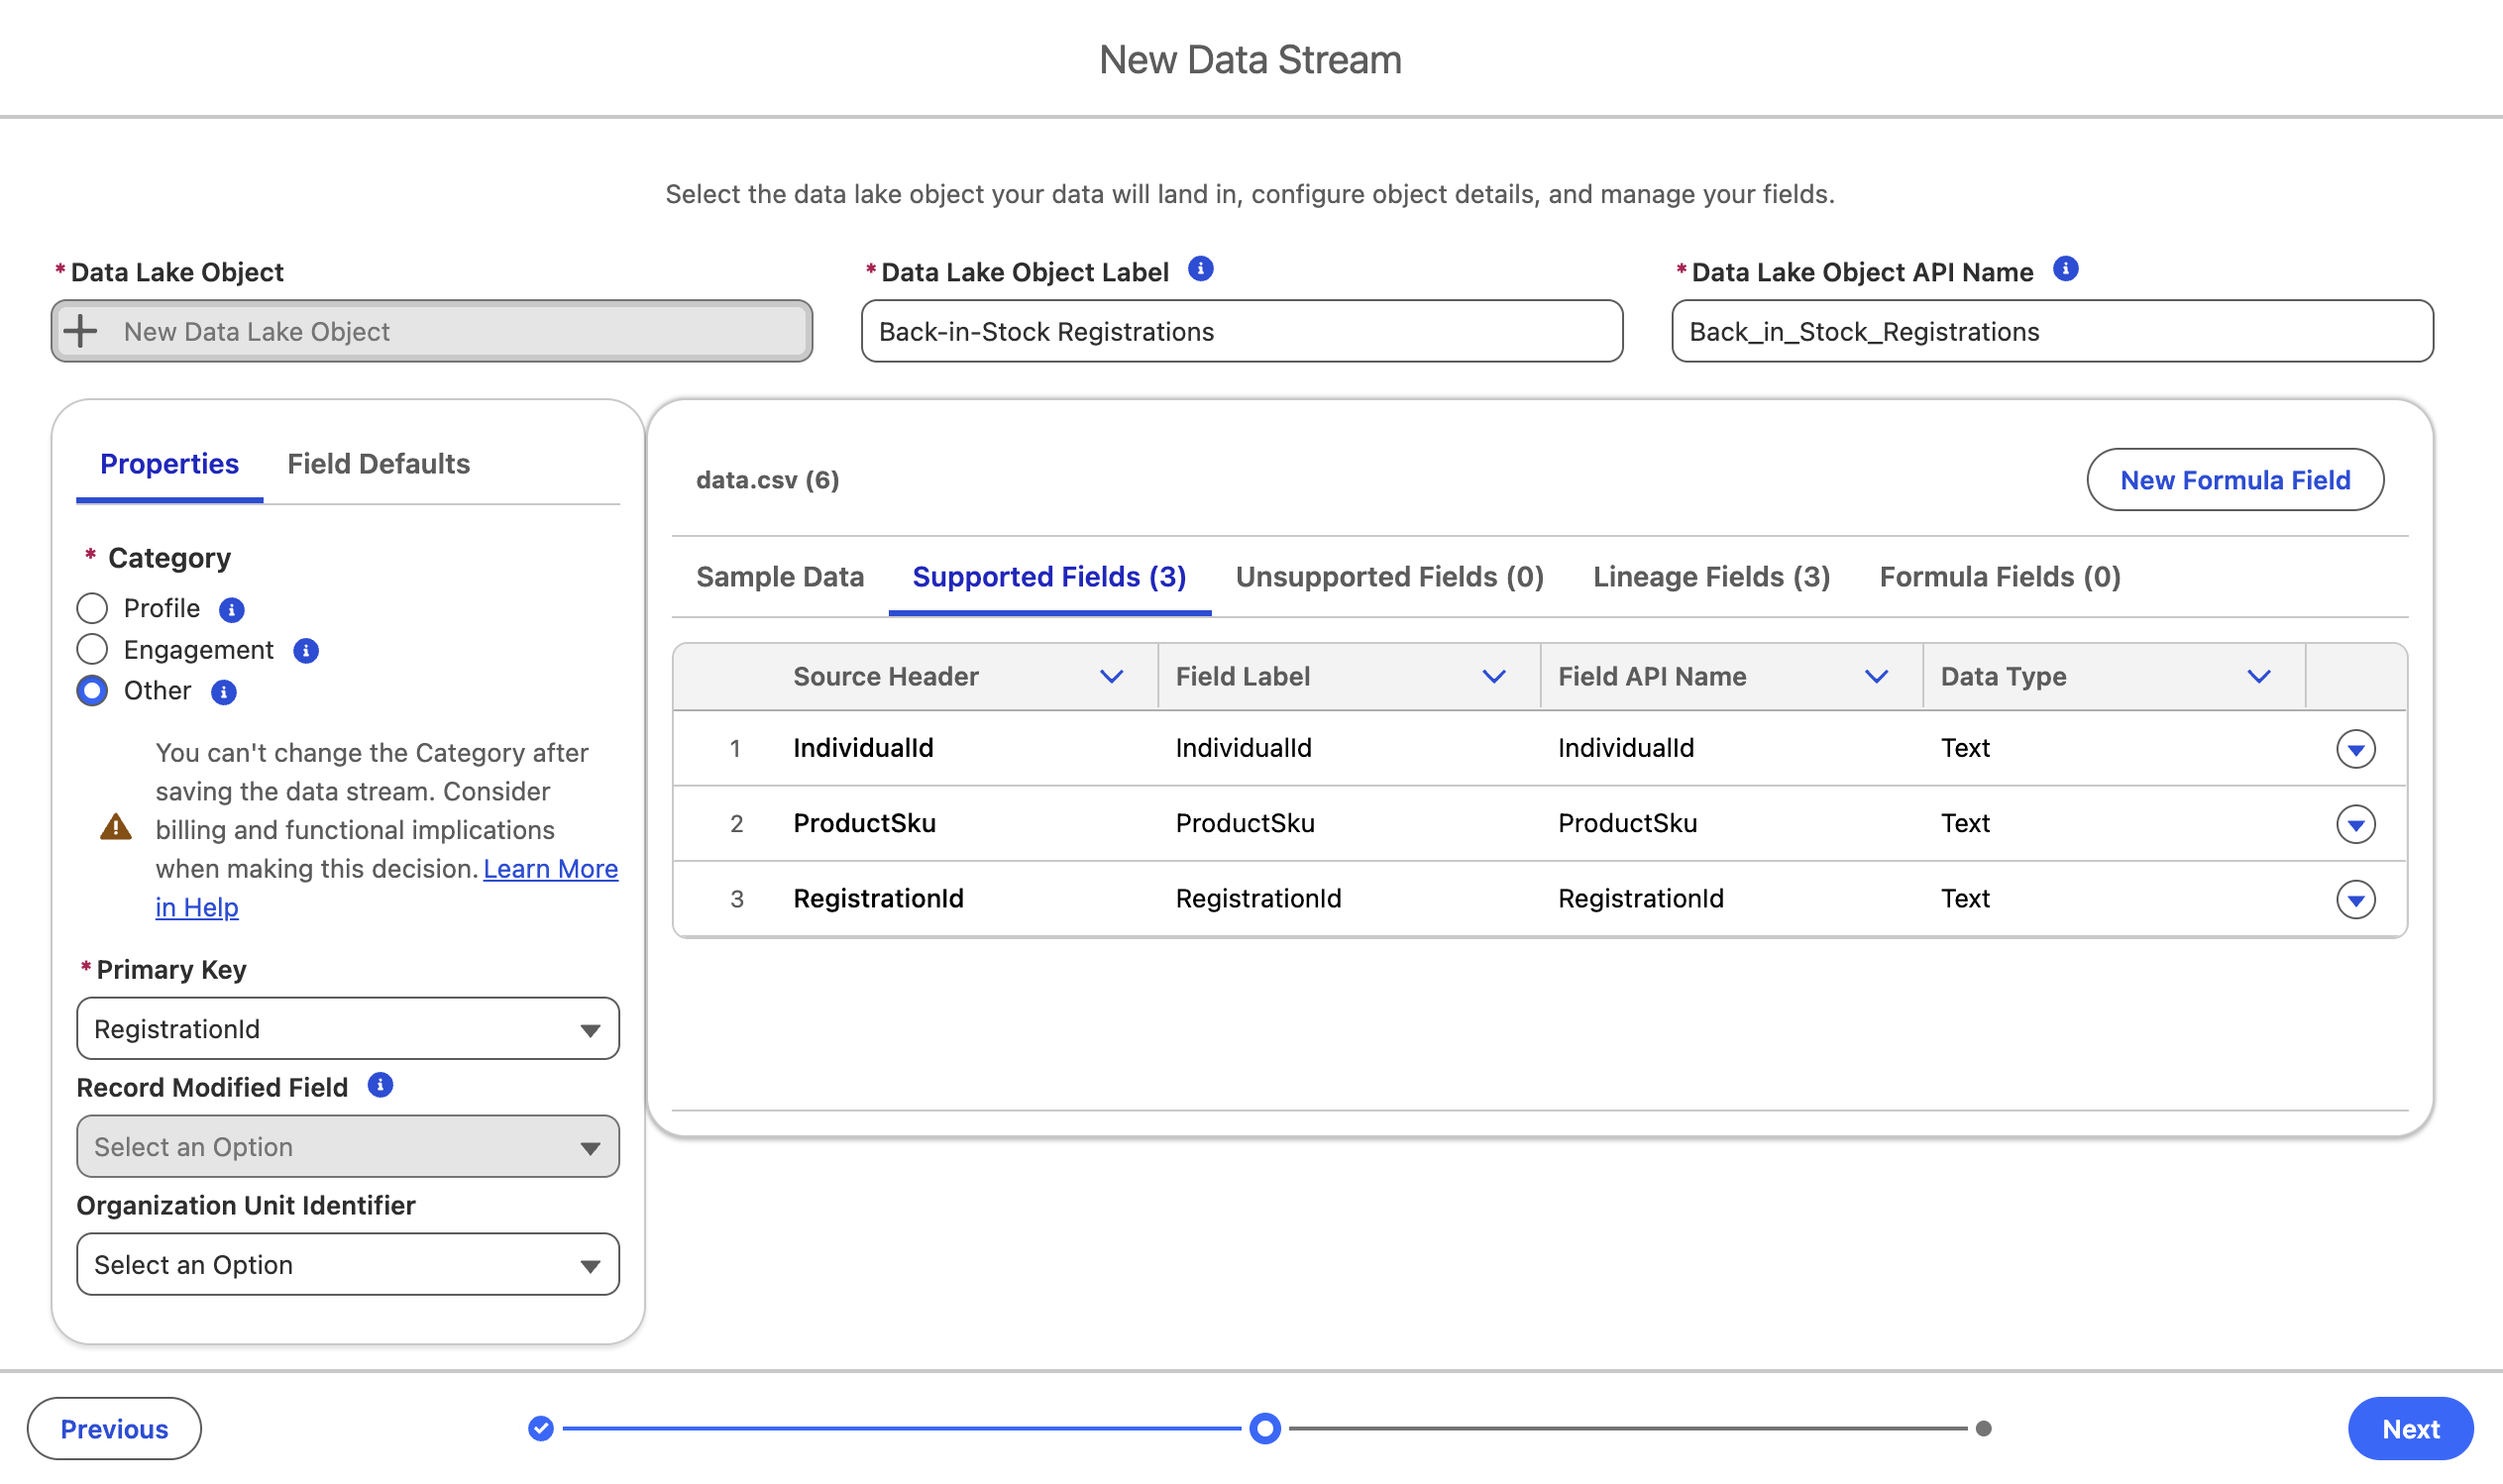
Back-in-Stock Registrationsin the Data Lake Object Label field. - Select Other from the Category type.
- Select RegistrationId as the Primary Key.
- Click on the Supported Fields tab.
- Update the ProductSku Data Type to Text.
- Click Next.
- Click Deploy.
- Click Start in the Data Mapping section.
- Click Select Objects.
- Click the Custom Data Model tab.
- Click New Custom Object.
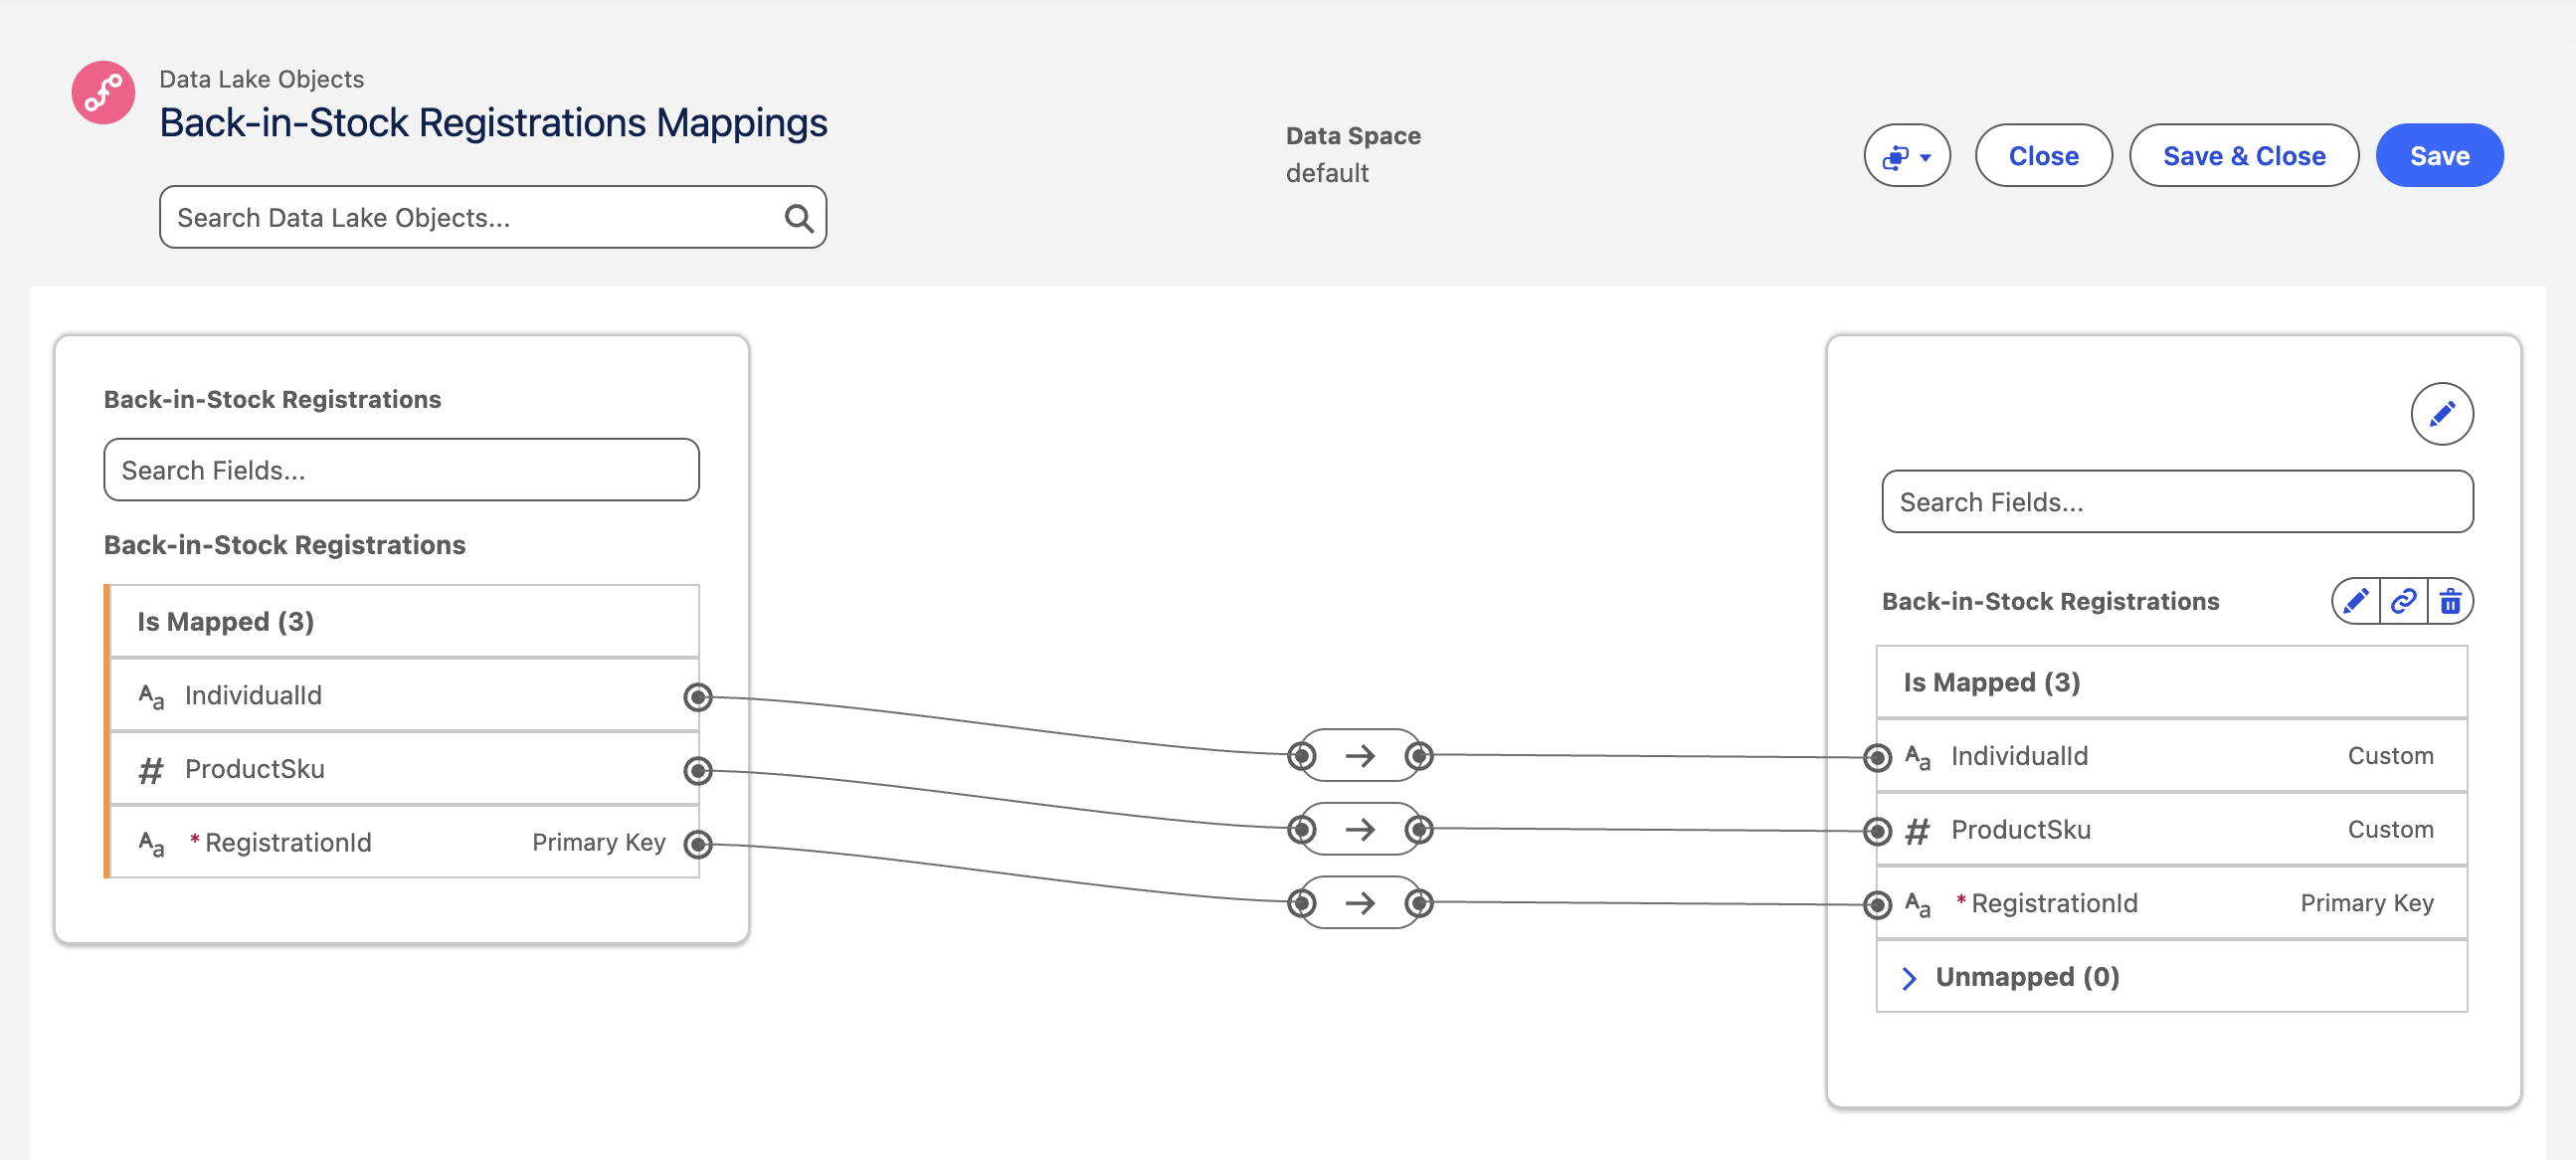
- Review the attributes, then click Save.
- Click Close.
Goods Product Data Stream
- Download this CSV file to your local computer.
- Select the Data Streams tab, then click New.
- Select the File Upload tile, then click Next.
- Click
Upload Files and choose the CSV file you downloaded in step 1. - Enter
NTO Product Catalogin the Data Lake Object Label field. - Select Other from the Category type.
- Select ProductSku as the Primary Key.
- Click Next.
- Click Deploy.
- Click Start in the Data Mapping section.
- Click Select Objects.
- Search for
Goods Product, then click theicon to select the DMO. - Click Done.
- Review the attributes, then click Save.
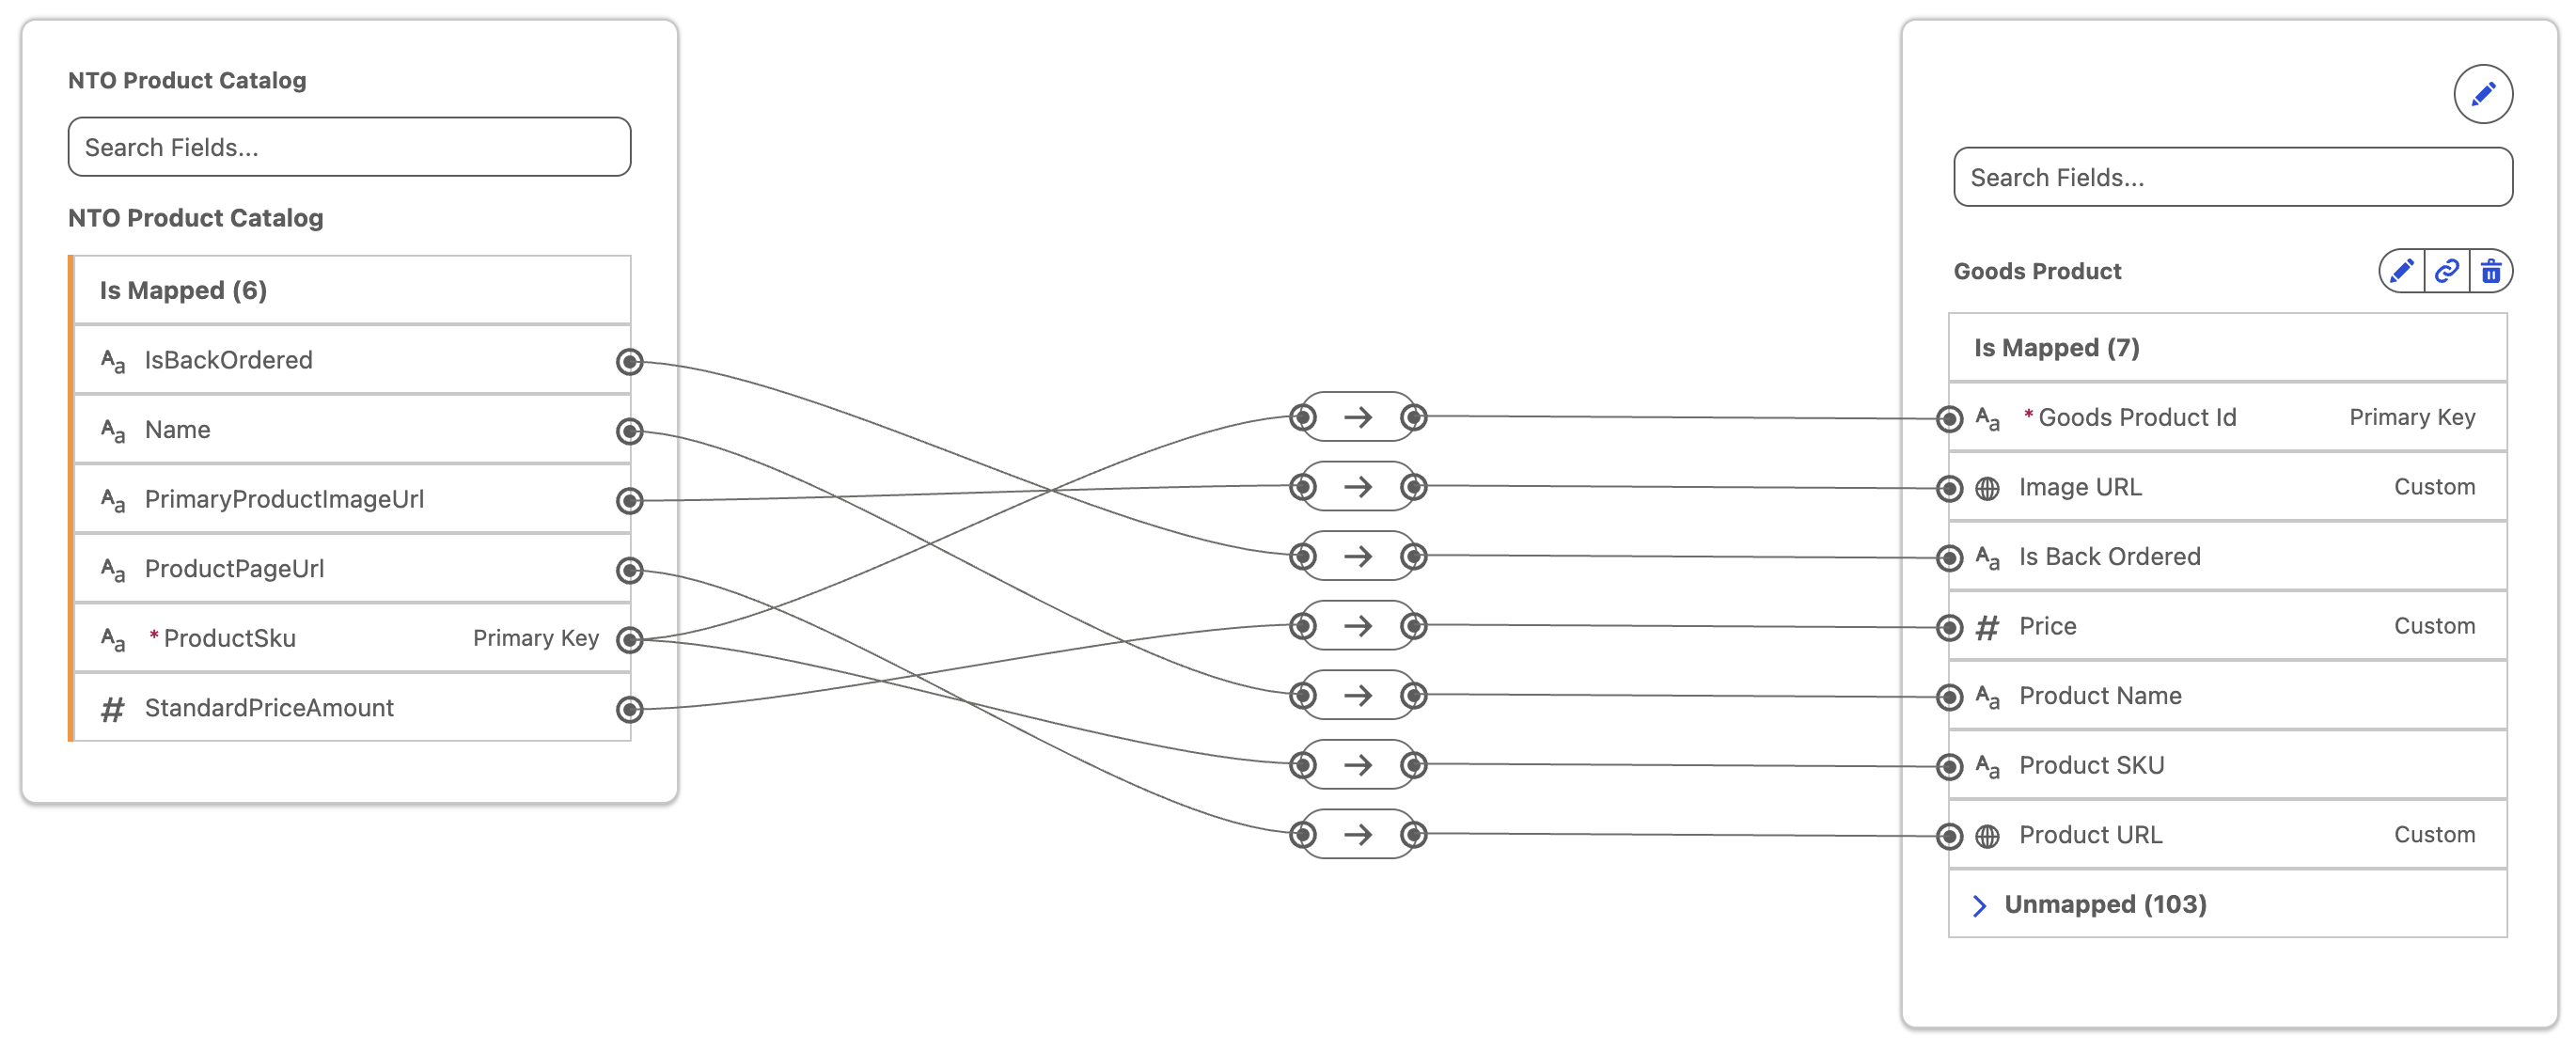
- Configure attribute mappings provided in the table below
| NTO Product Catalog | Goods Product |
|---|---|
| IsBackOrdered | Is Back Ordered |
| Name | Product Name |
| ProductSku | Goods Product Id & Product SKU |
- Click Save.
- Expand the Unmapped section, then click Add New Field.
- Enter
Product URLin the Field Label field. - Select URL from the Data Type menu.
- Click Save.
- Repeat steps 17-19 for the following custom attributes:
Image URL(Data Type: URL)Price(Data Type: Number)
- Map the source fields to the new custom fields as shown in the screenshot below (click image to enlarge).
- Click Save & Close.
Create Data Model Relationships
In this exercise, you will create object relationships for the Back-in-Stock Registrations DMO so related attributes can be used for segmentation and activation.
- Click on the Data Model tab.
- Enter
Back-in-Stock Registrationsin the search field, then select the object label. - Click the Relationships tab.
- Click New, then click
New Relationship. - Configure the following two relationships:
| Object | Field | Cardinality | Related Object | Related Field |
|---|---|---|---|---|
| Back-in-Stock Registrations | IndividualId | N:1 | Data Cloud: Individual | Individual Id |
| Back-in-Stock Registrations | ProductSku | 1:1 | Data Cloud: Goods Product | Goods Product Id |
- Click Save & Close.
Build Segment
In this exercise, you’ll create a segment that includes individuals who have signed up for back-in-stock alerts.
- Select Segments from the More menu tab.
- Click New, then click Next to use the default creation options.
- Select Individual from the Segment On menu.
- Enter
Back-in-Stock Registrationsin the Segment Name field. - Click Next, then click Save to accept the default publish type and schedule.
- Select Attributes from ther Resources panel, then scroll down to Back-in-Stock Registrations in the Related Data Model Objects section and select the DMO.
- Select Goods Product from the Data Model Object section in the attributes panel and drag Is Back Ordered to the segment canvas.
- Enter
noin the attribute Value field, then click Done. - Click the recount
icon to determine the segment population and wait for the count to finish processing.
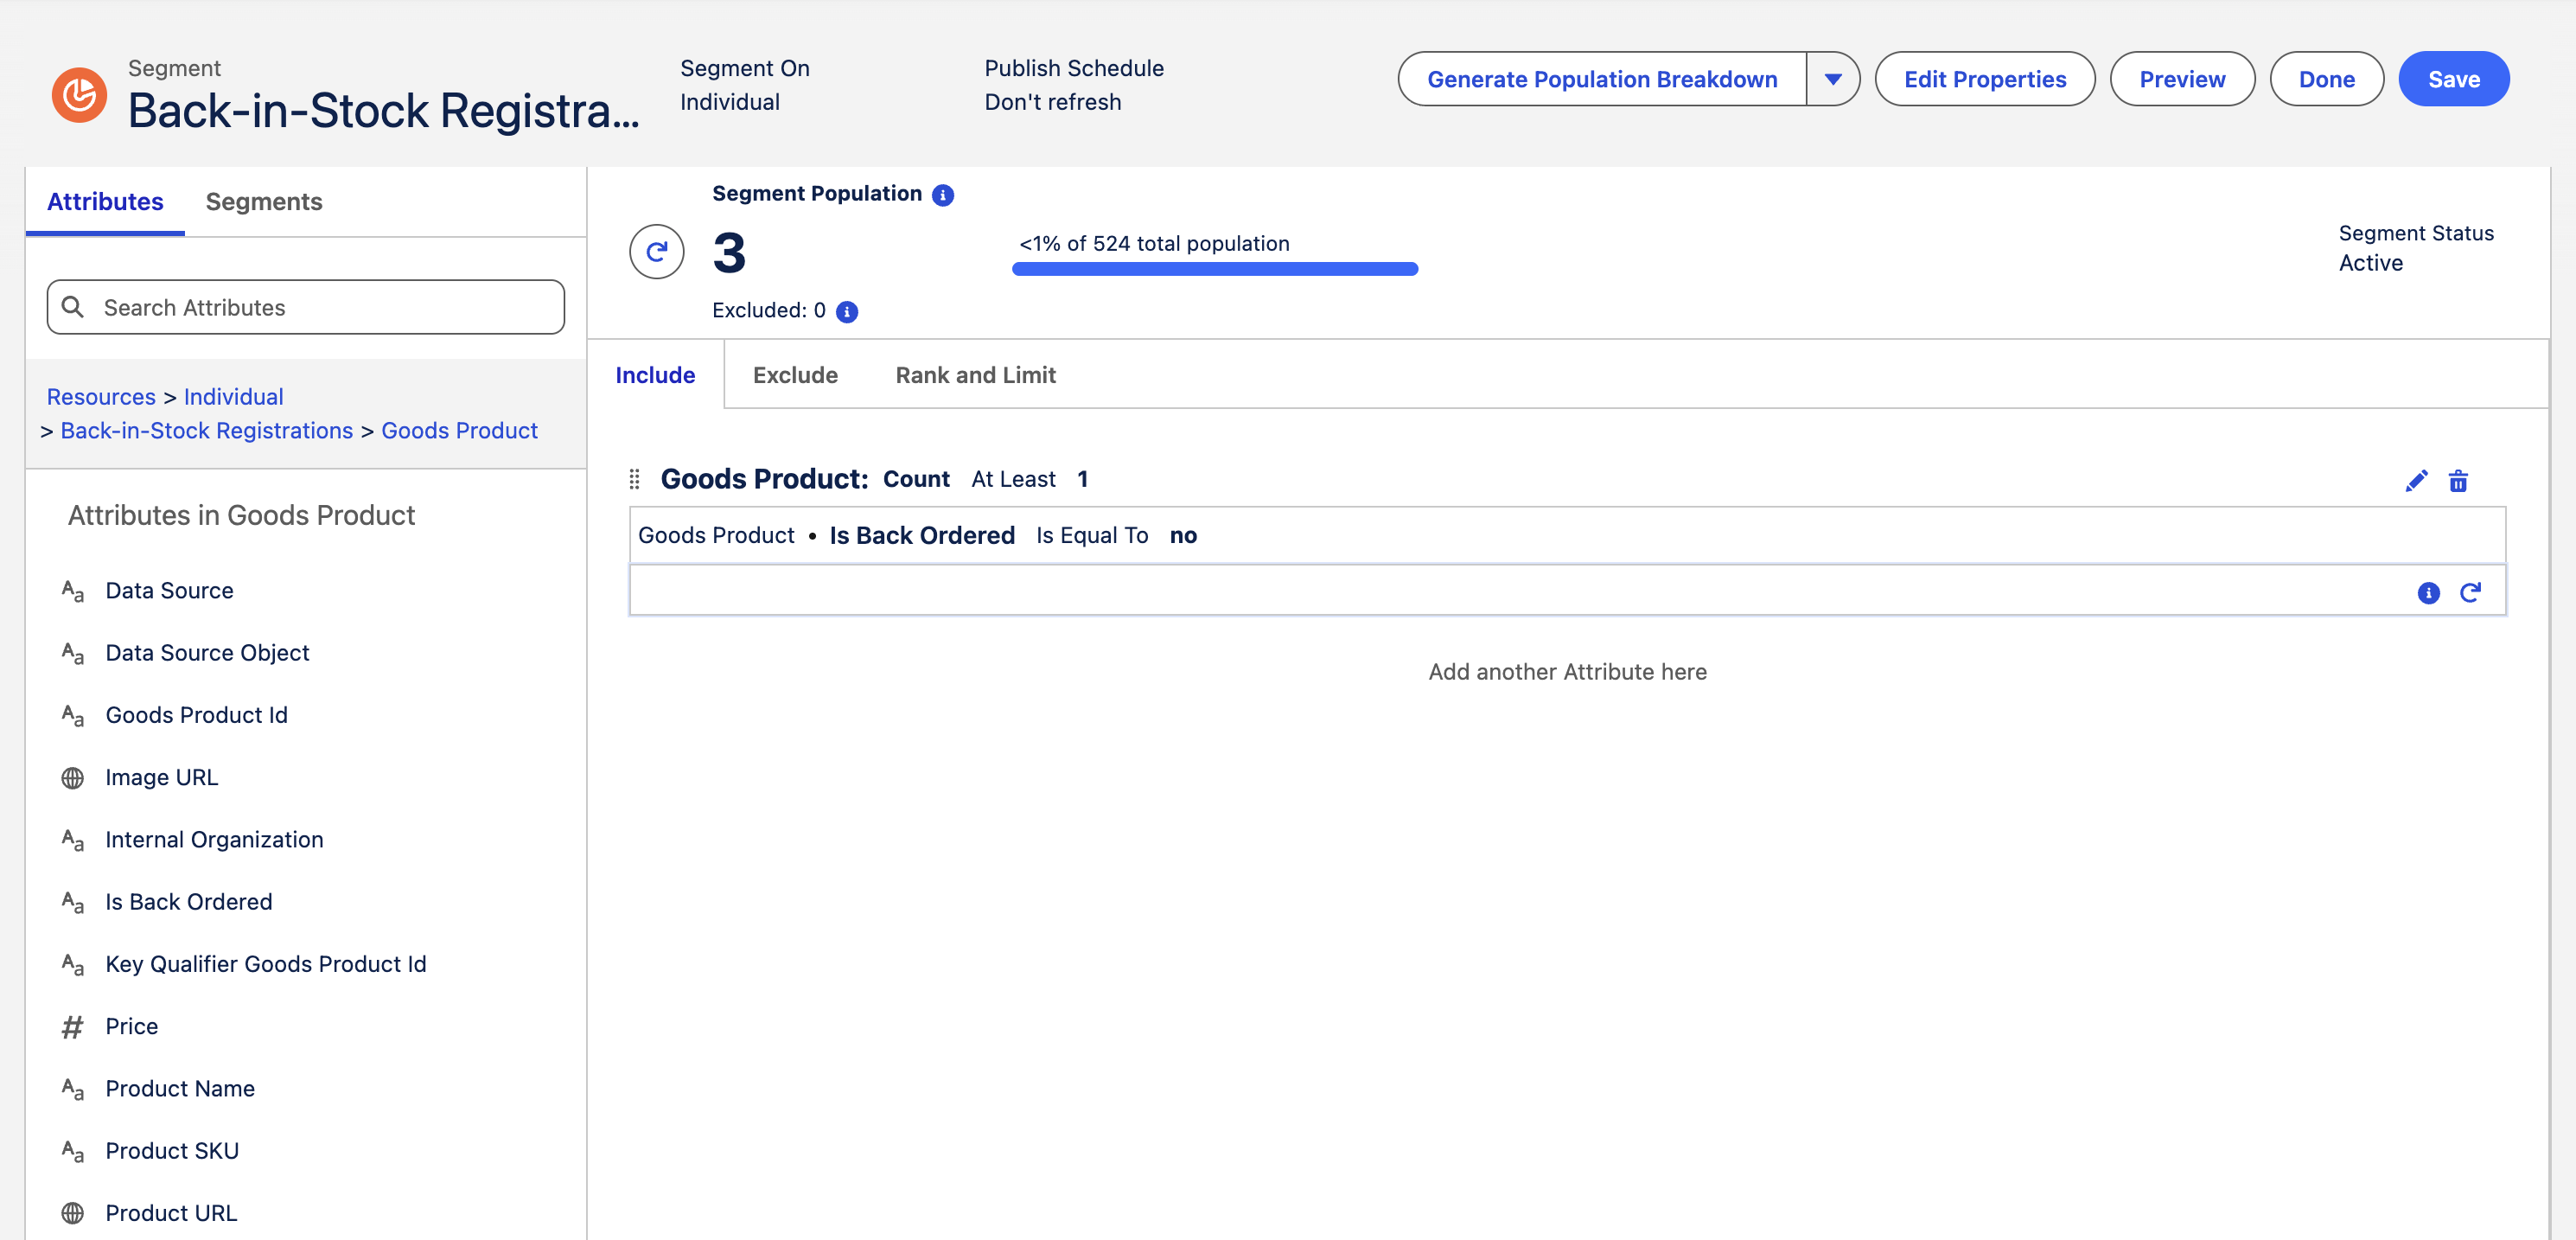
Segment Criteria
This segment includes individuals who requested a back-in-stock alert for a product that is currently in stock. It matches records in the Back-in-Stock Registrations DMO to their related products in the Goods Product DMO, based on the relationships you defined in the previous exercise.
- Click Done.
Create Activation Target
Activation is the process that publishes a segment to an activation target, allowing you to take action on that data. An activation target is used to store authentication and authorization information for a given activation platform.
In this exercise, you will create an Data Cloud Activation Target, which will be used by an activation and an Activation-Triggered Flow.
- Select Activation Targets from the More menu tab.
- Click New.
- Select the Data Cloud activation platform, then click Next.
- Enter
Back-in-Stock Registrationsin the Activation Target Name field. - Choose default from the Data Space menu, then click Save.
Create Activation
In this exercise, you will create an activation that publishes a segment to your activation target. You will add related attributes to the Activation so they are available for content personalization.
- Select Activations from the More menu tab.
- Click New.
- Choose the Segment activation type, then click Continue.
- Select Back-in-Stock Registrations from the Segment menu.
- Select Back-in-Stock Registrations from the Activation Target menu.
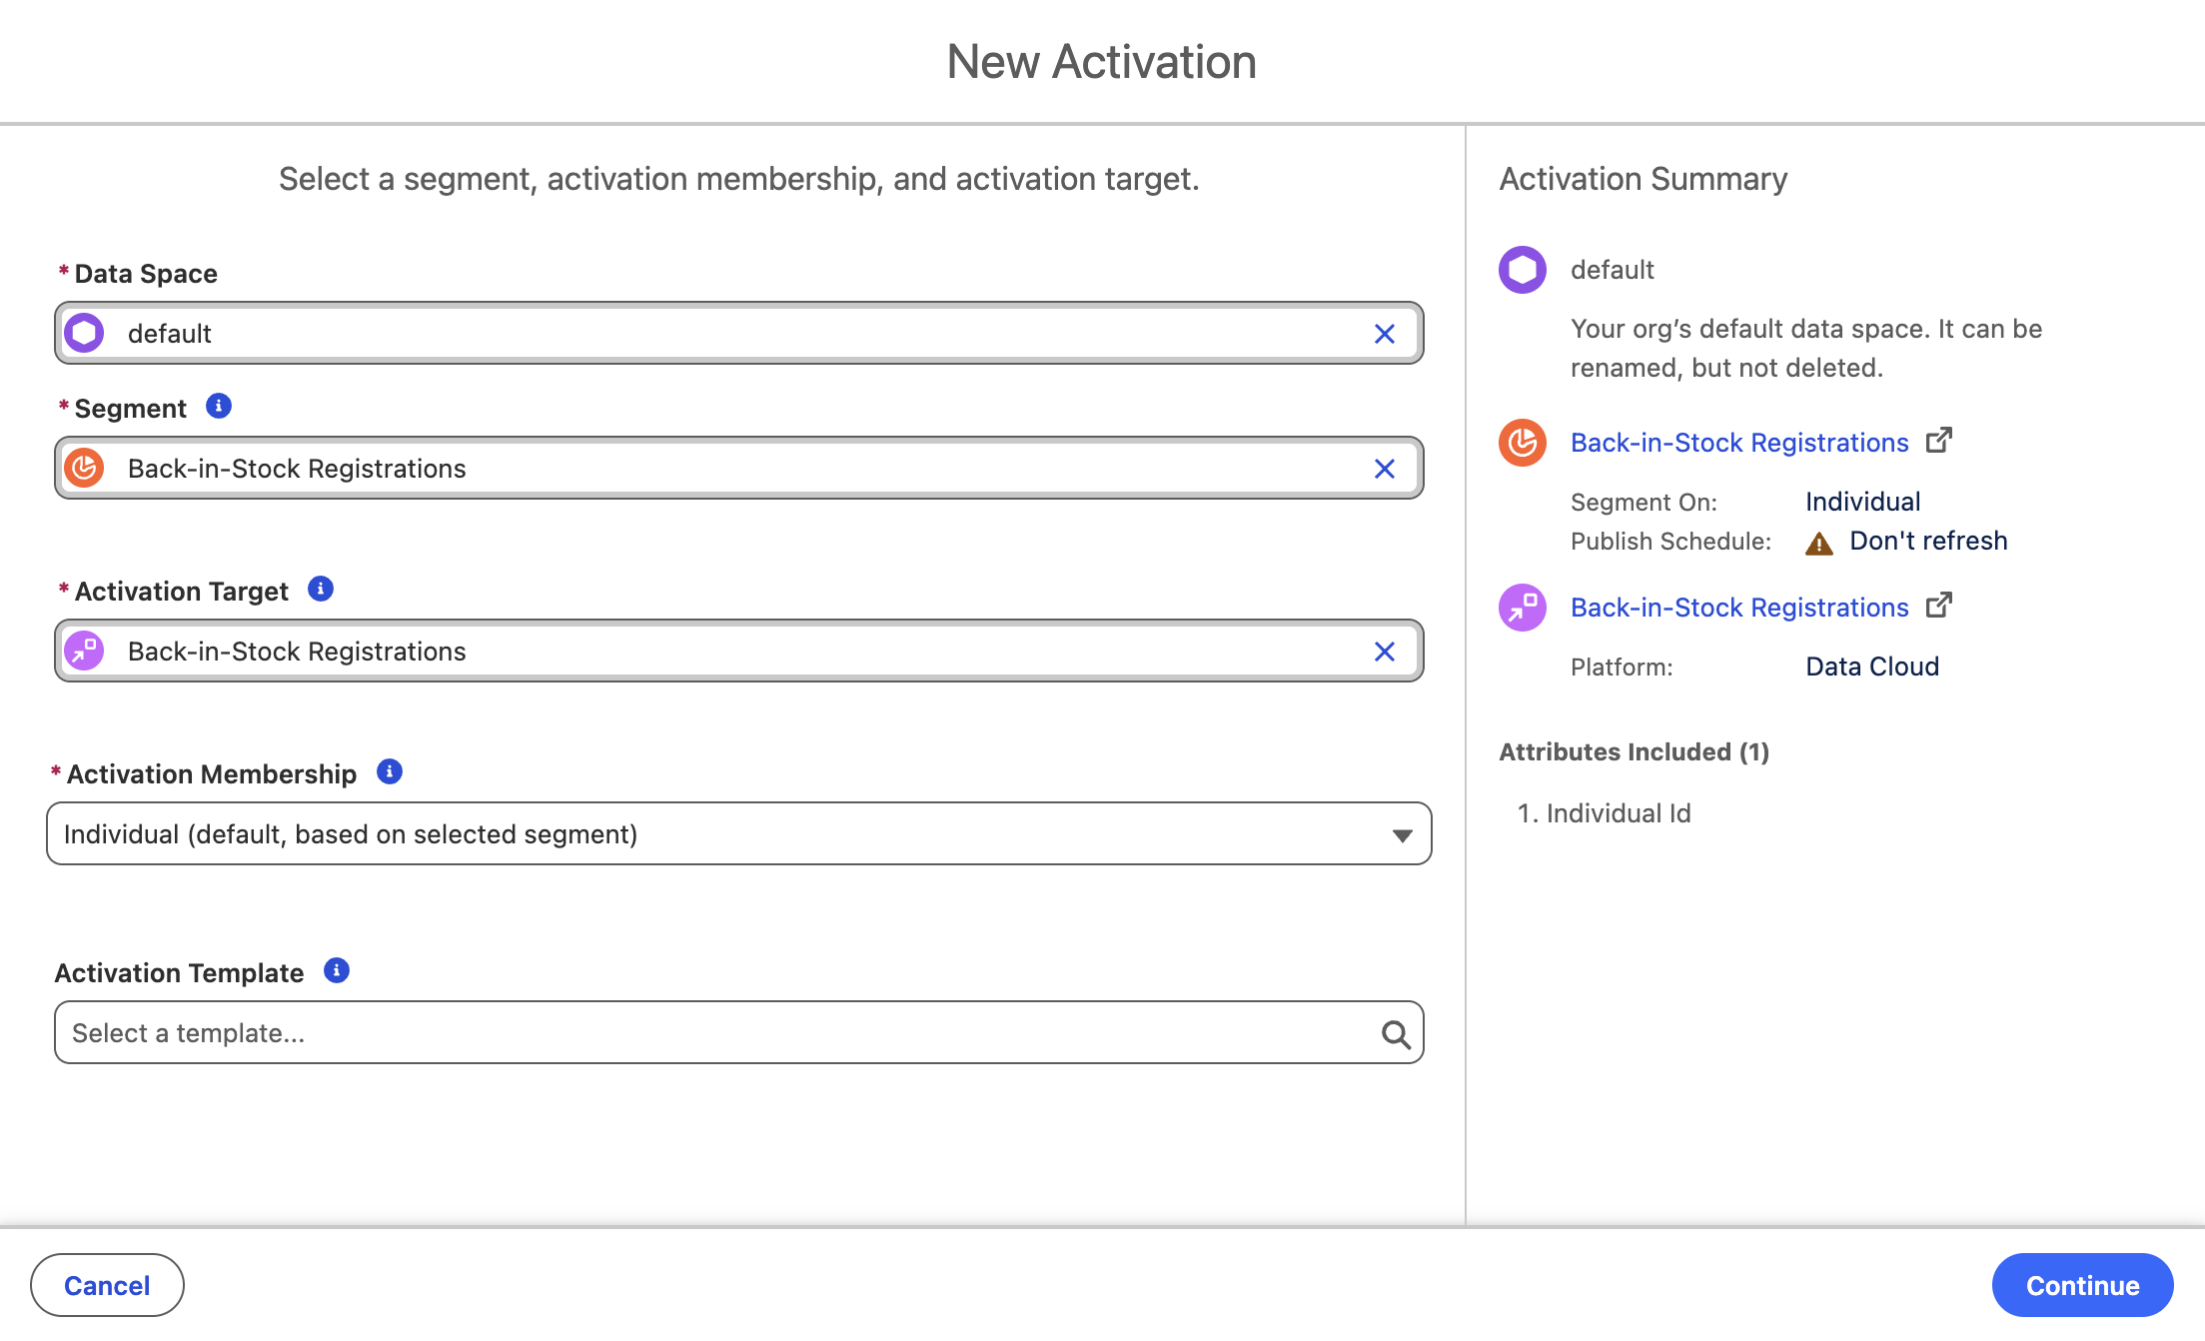
- Click Continue.
- Click
Select in the Email contact point section.
Contact Points
Contact points determine which contact point value (for example, an email address) is included in the activation and sent to an activation target. Use the source priority order to determine which contact point value is selected for the activation, for the scenario where an individual has more than one contact point.
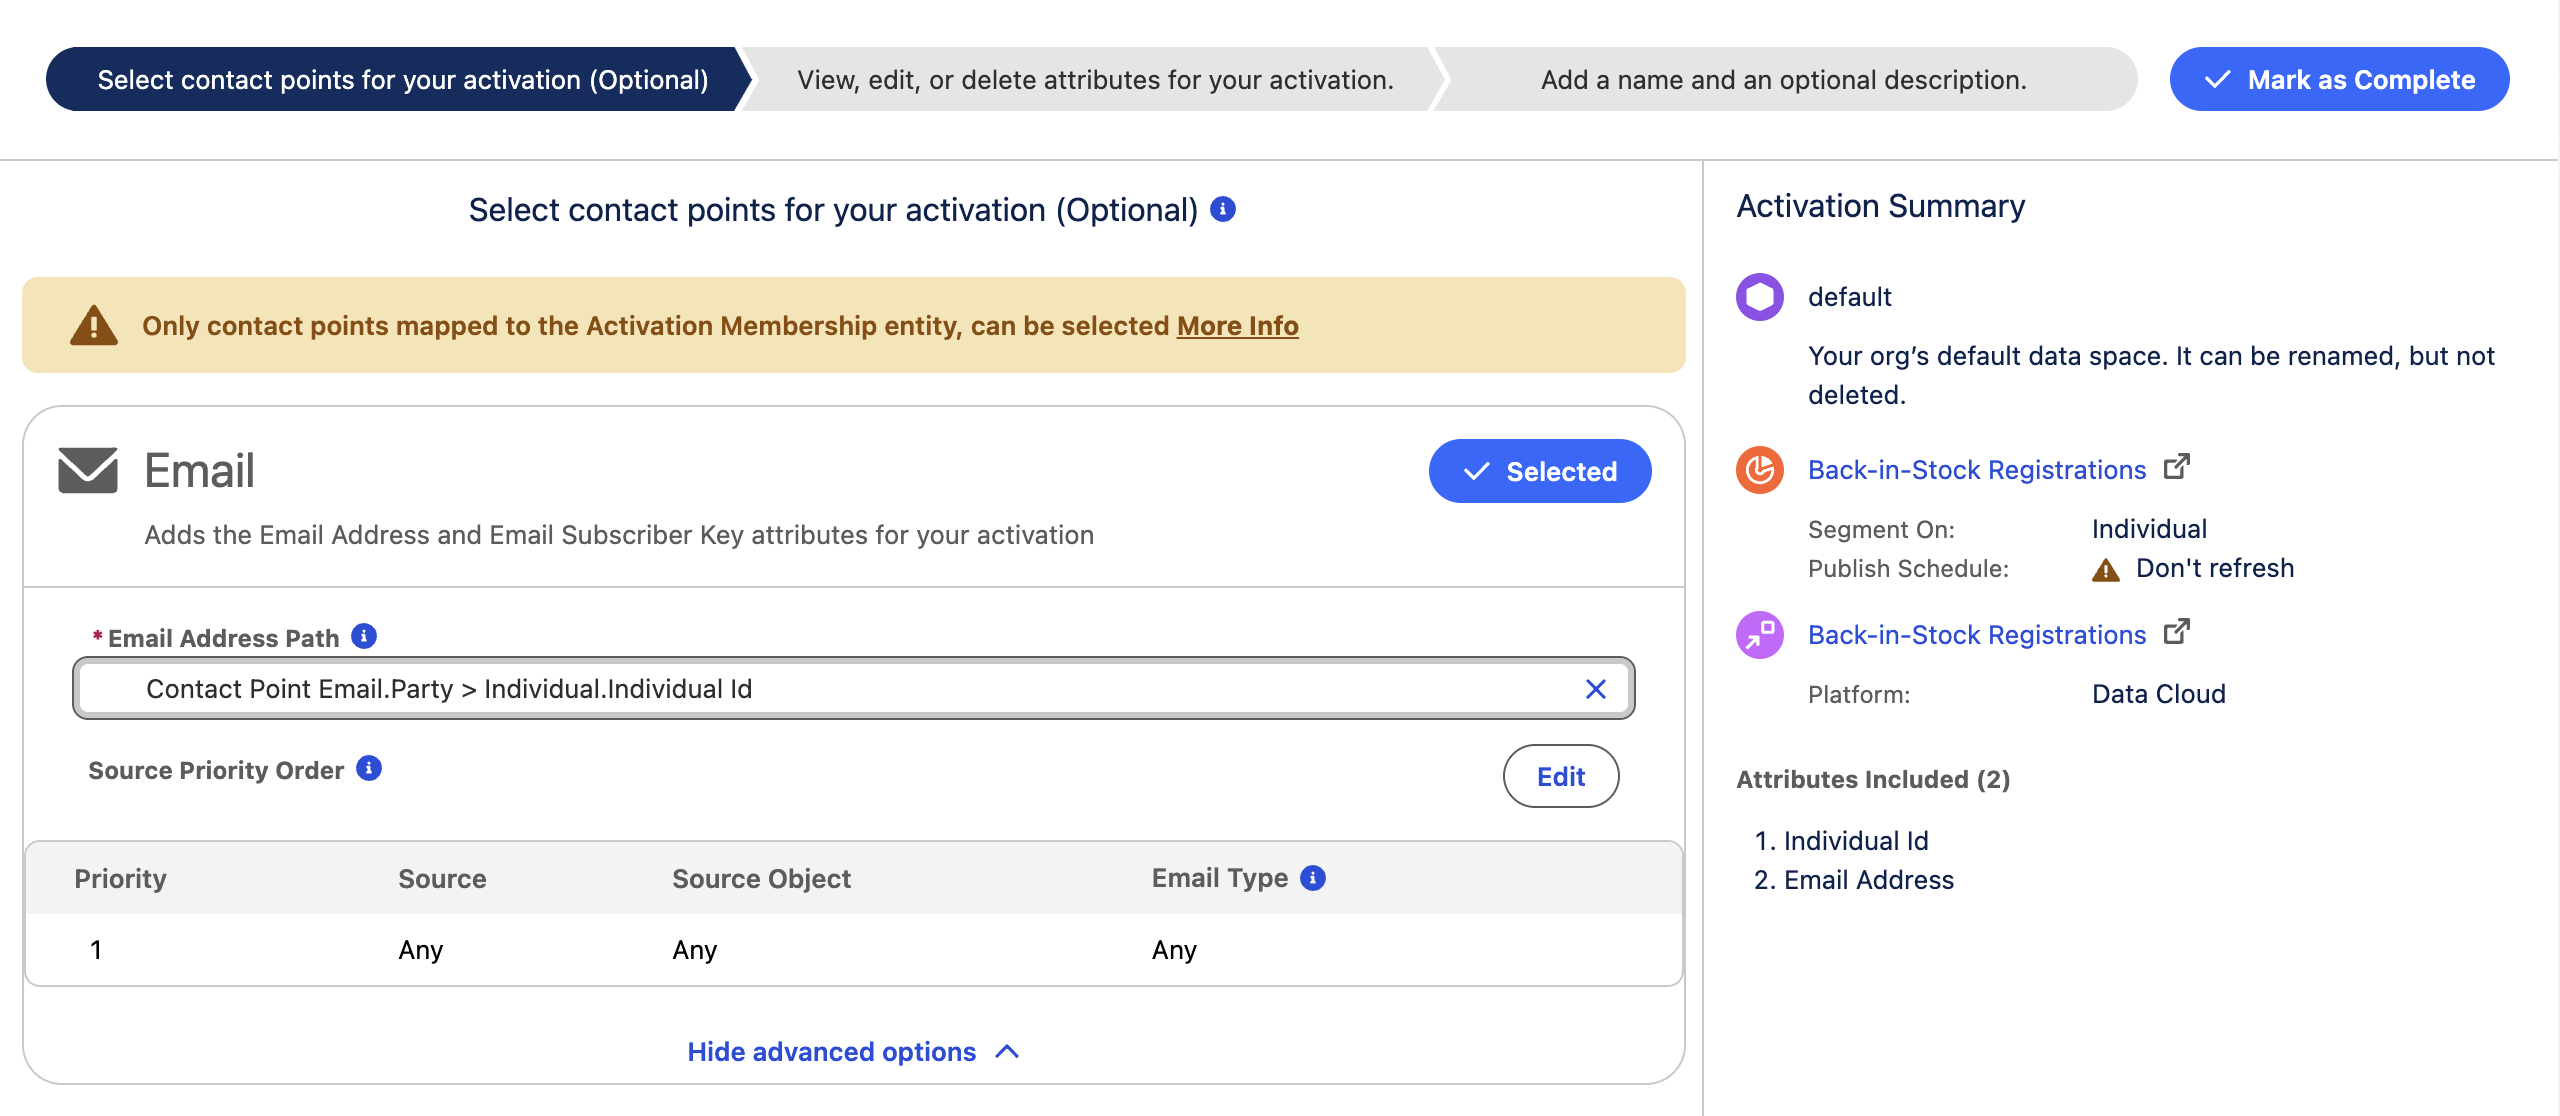
- Click View, edit, or delete attributes for your activation.
- Click Add Attributes.
- Select Individual from the Direct Attributes section.
- Drag the First Name field to the activation canvas.
- Expand the Related Attributes section, then select Back-in-Stock Registrations.
- Click on Goods Product in the first row of the related attributes list.
- Drag the following attributes over to the activation canvas:
- Image URL
- Price
- Product Name
- Product SKU
- Product URL
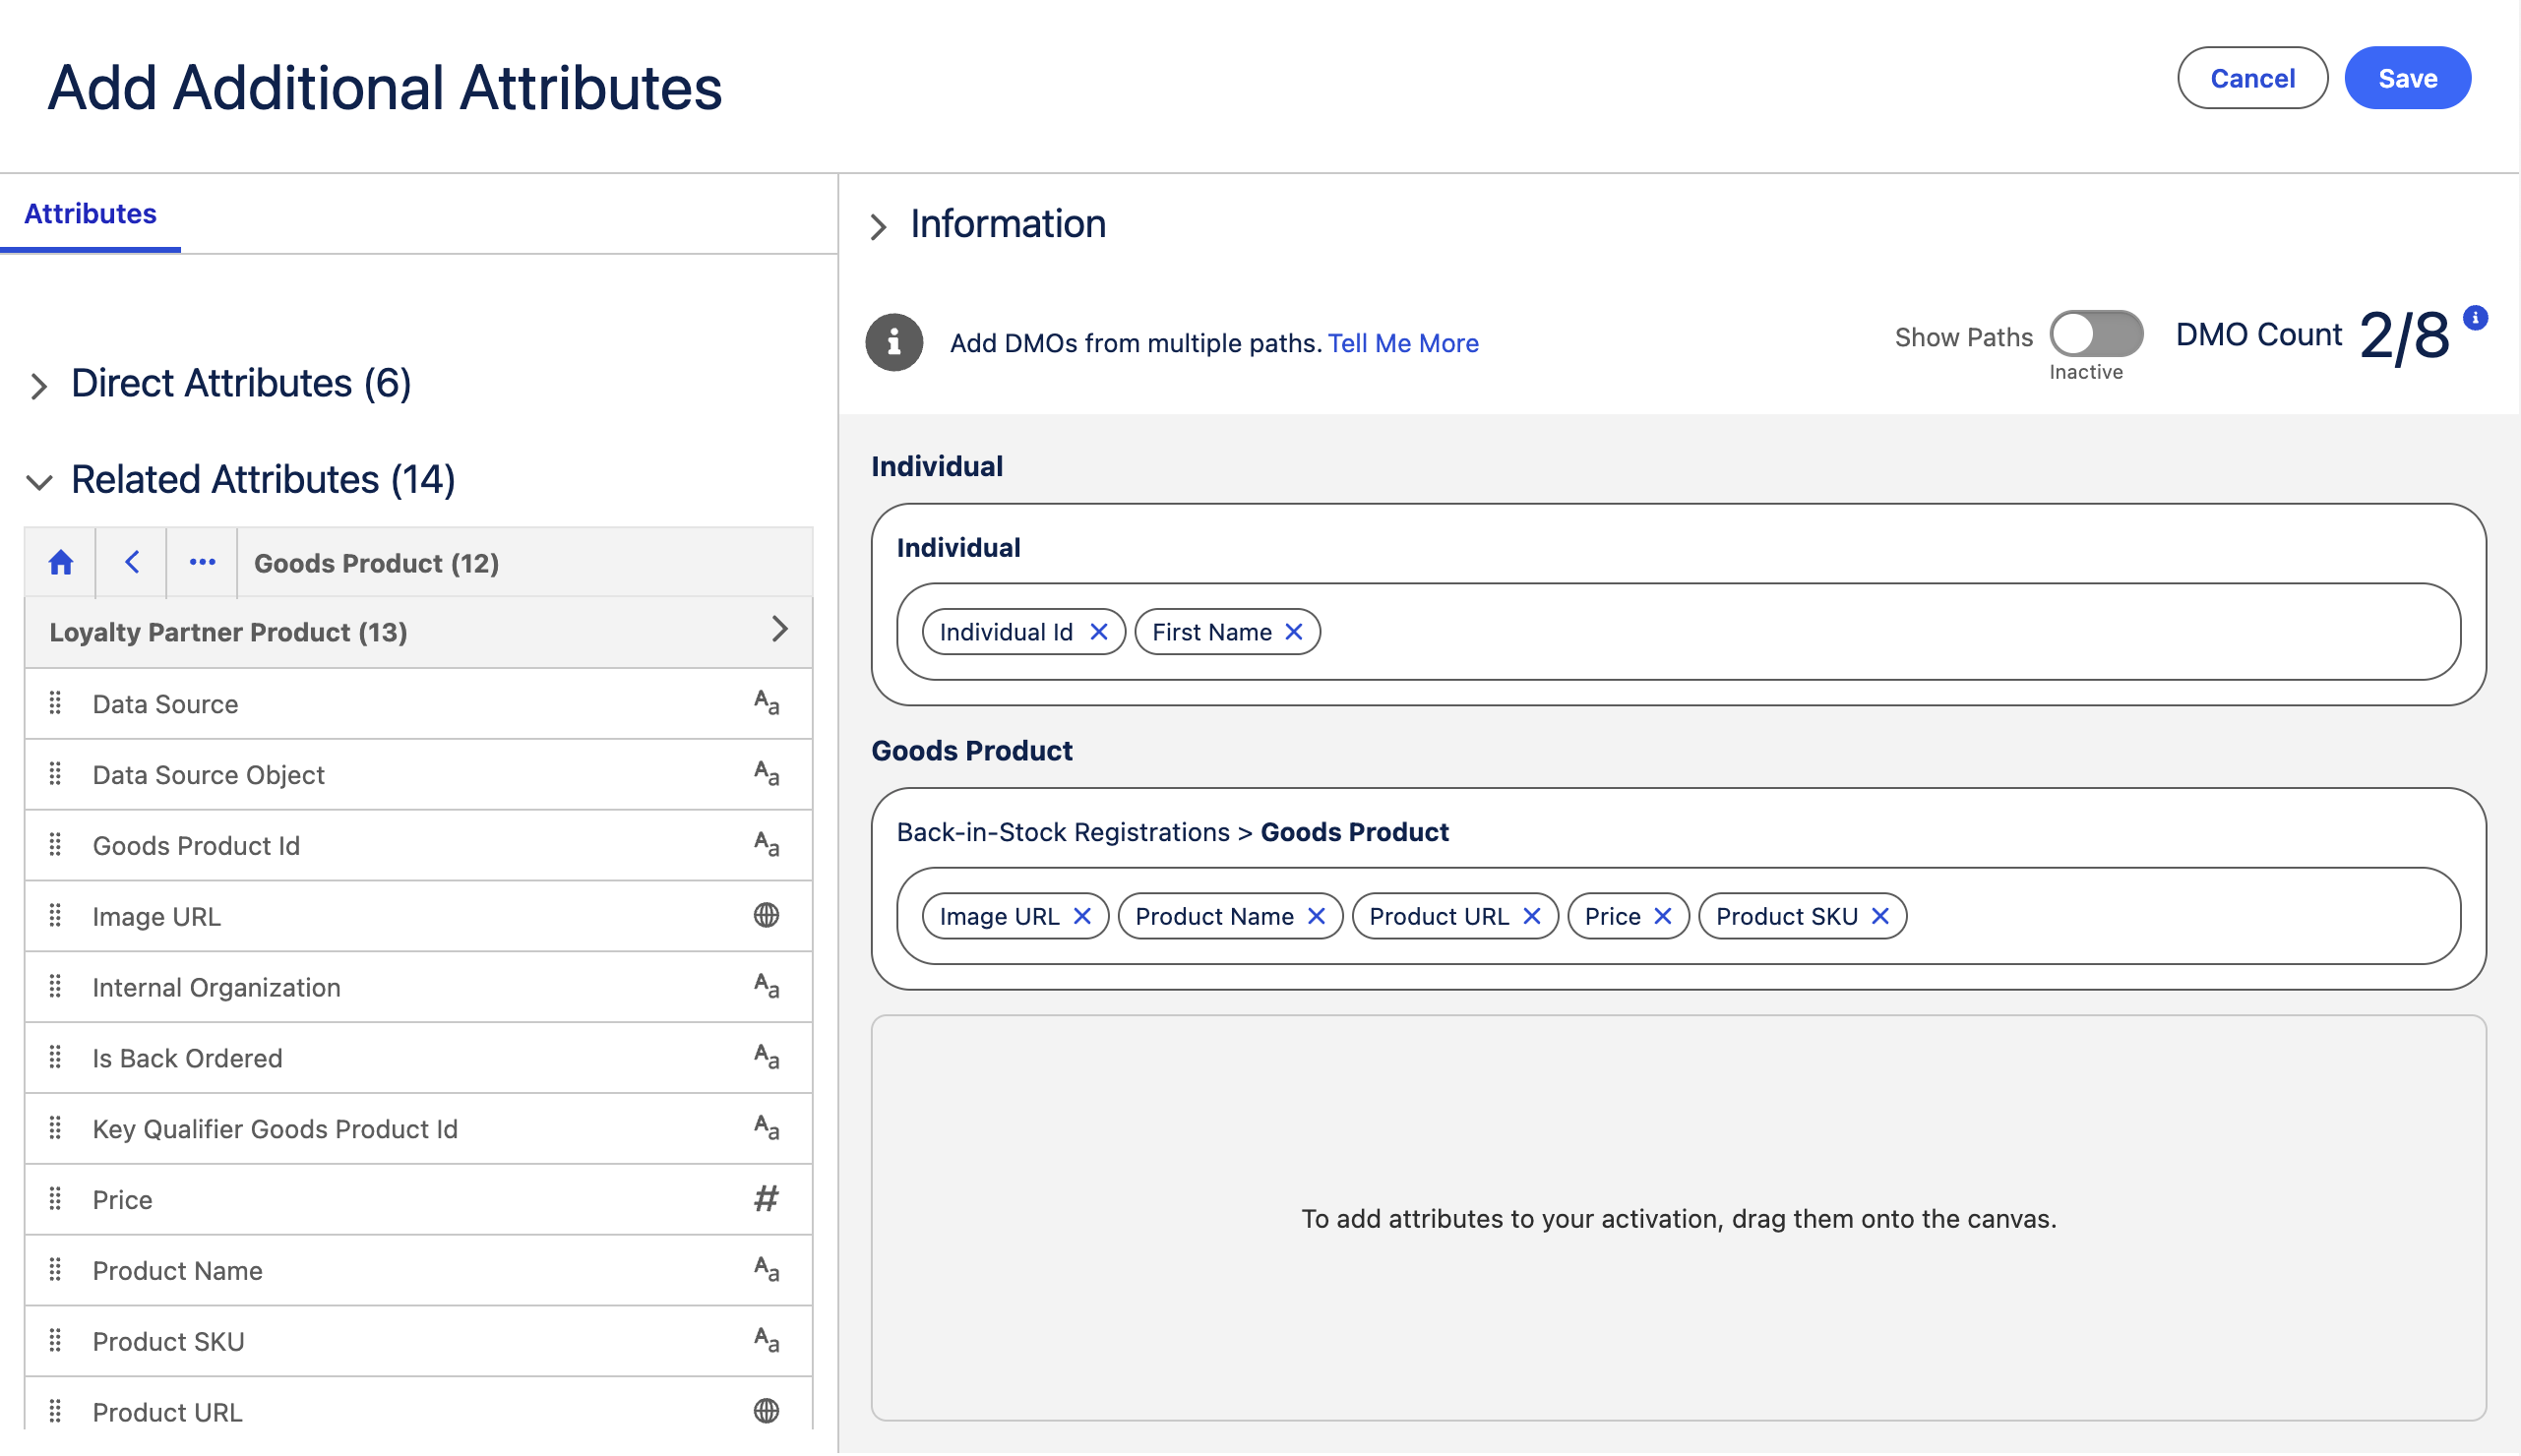
- Click Save.
- In the Goods Product Atrributes section, select Product SKU from the Sort By field.
Attributes Sort Order and Filters
A related data model object (DMO) with a one-to-many relationship can return multiple records for each segment member. In the Attributes panel, you can set the maximum number of related records to return and choose the sort order. For this exercise, set the limit to 1 to return a single product record.
You can also use attribute filters to specify which related records to include based on their field values.
- Click Add a name and an optional description.
- Enter
Back-in-Stock Registrationsin the Activation Name field. - Click
Mark as Complete.
Publish Segment
Now that you’ve created the activation, you can publish the segment. This will automatically publish the associated activation.
- Click the Segments tab, then select Back-in-Stock Registrations from the list view.
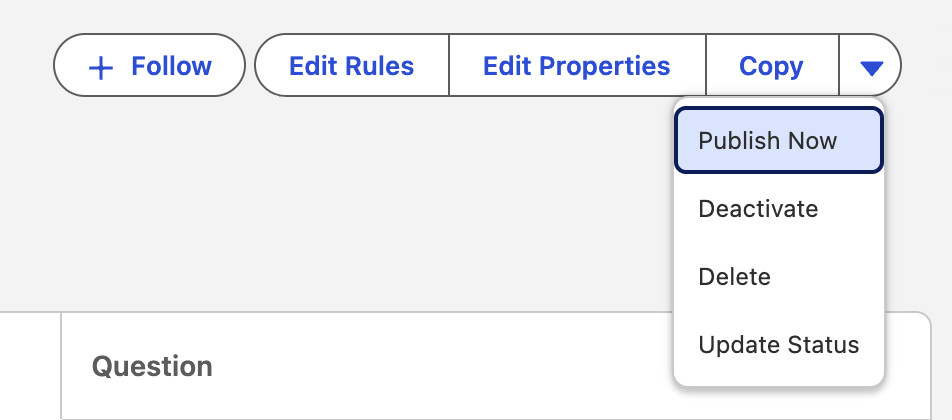
- Select Publish Now from the
in the button group. - The segment will take a few minutes to publish, but you can continue to the next exercise.
Add Trusted URL
The Goods Product Data Stream includes a URL attribute to an external image source, which will be used in your email. In order to allow the image to appear when previewing the email in Marketing Cloud Next, the URL domain needs to be added as a Trusted URL.
- Click on the icon and click the first Setup menu item.
- In the Quick Find field, enter
Trustedand select Trusted URLs. - Click New Trusted URL.
- Enter
NTOin the API Name field. - Enter
https://www.northerntrailoutfitters.comin the URL field. - Click Save.
Import Content to CMS Workspace
In this exercise, you will import a pre-built email and image assets to a CMS workspace.
- Open the Marketing app from App Launcher
. - Click the Content tab.
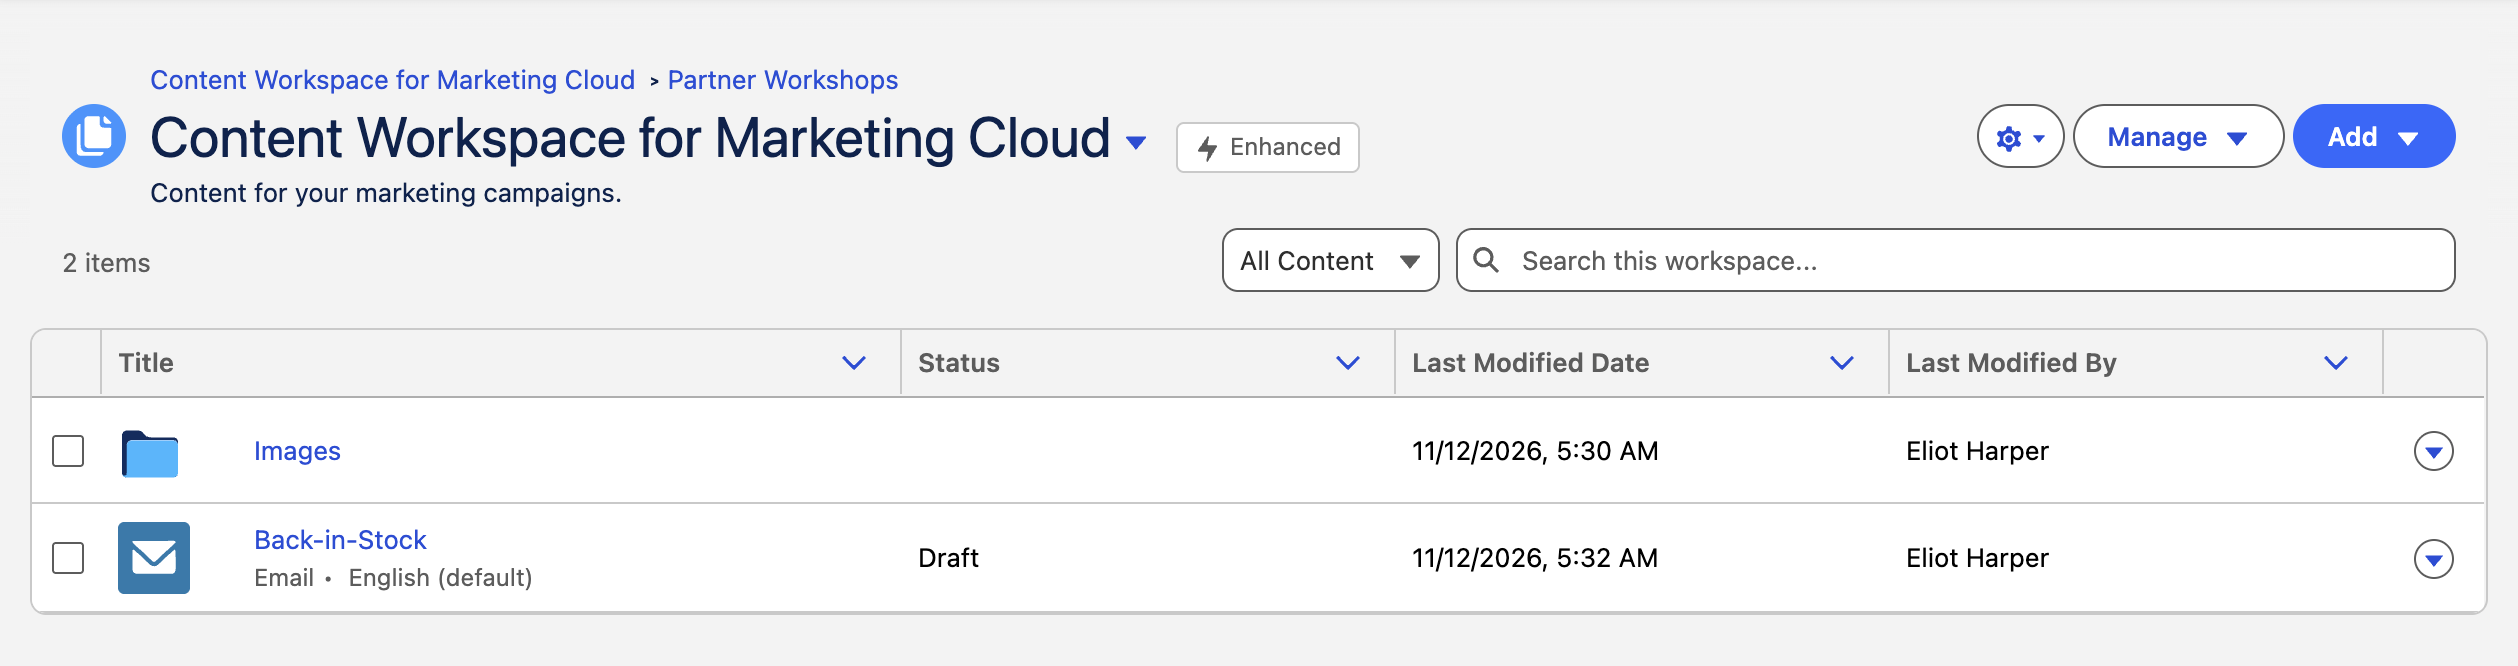
- Select Content Workspace for Marketing Cloud from the list view.
- Download this media file to your local computer.
- Click Manage, then select Import.
- Click
Upload and select the file that you previously downloaded, then click Done. - Reload the page and check the Partner Workshops folder has been created in the workspace. If it’s missing, wait a few seconds, then refresh the page and check again.
- Click Import.
- Download this content file to your local computer.
- Repeat steps 4-7 to import the file you downloaded in the previous step.
- Open the Partner Workshops folder and verify that the Back-in-Stock email appears. If it’s missing, wait a few seconds, then refresh the page and check again.
Personalize Email
In this exercise, you will configure an Activation Data Provider and add merge fields to your email.
Configure Activation Data Provider
- Click the Back-in-Stock email from the Partner Workshops folder in the CMS workspace.
- Click Edit.
- Select the Data Sources tab.
- Expand the
Triggers section. - Click
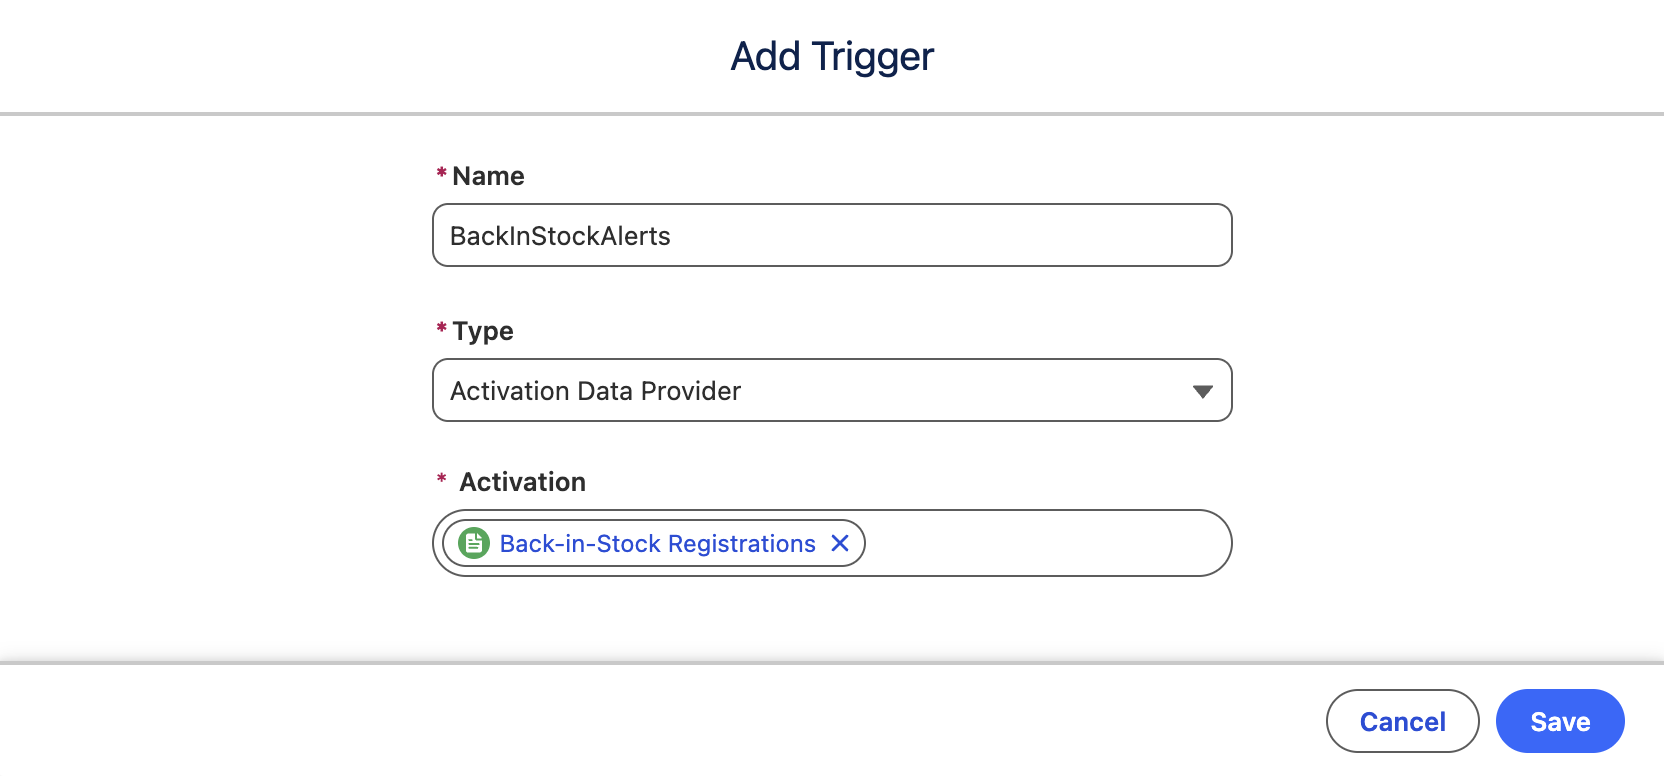
Add Triggers. - Select Activation Data Provider from the Type menu.
- Enter
BackInStockAlertsin the Name field. - Select Back-in-Stock Registrations from the Activation menu.
- Click Save.
Add Merge Fields
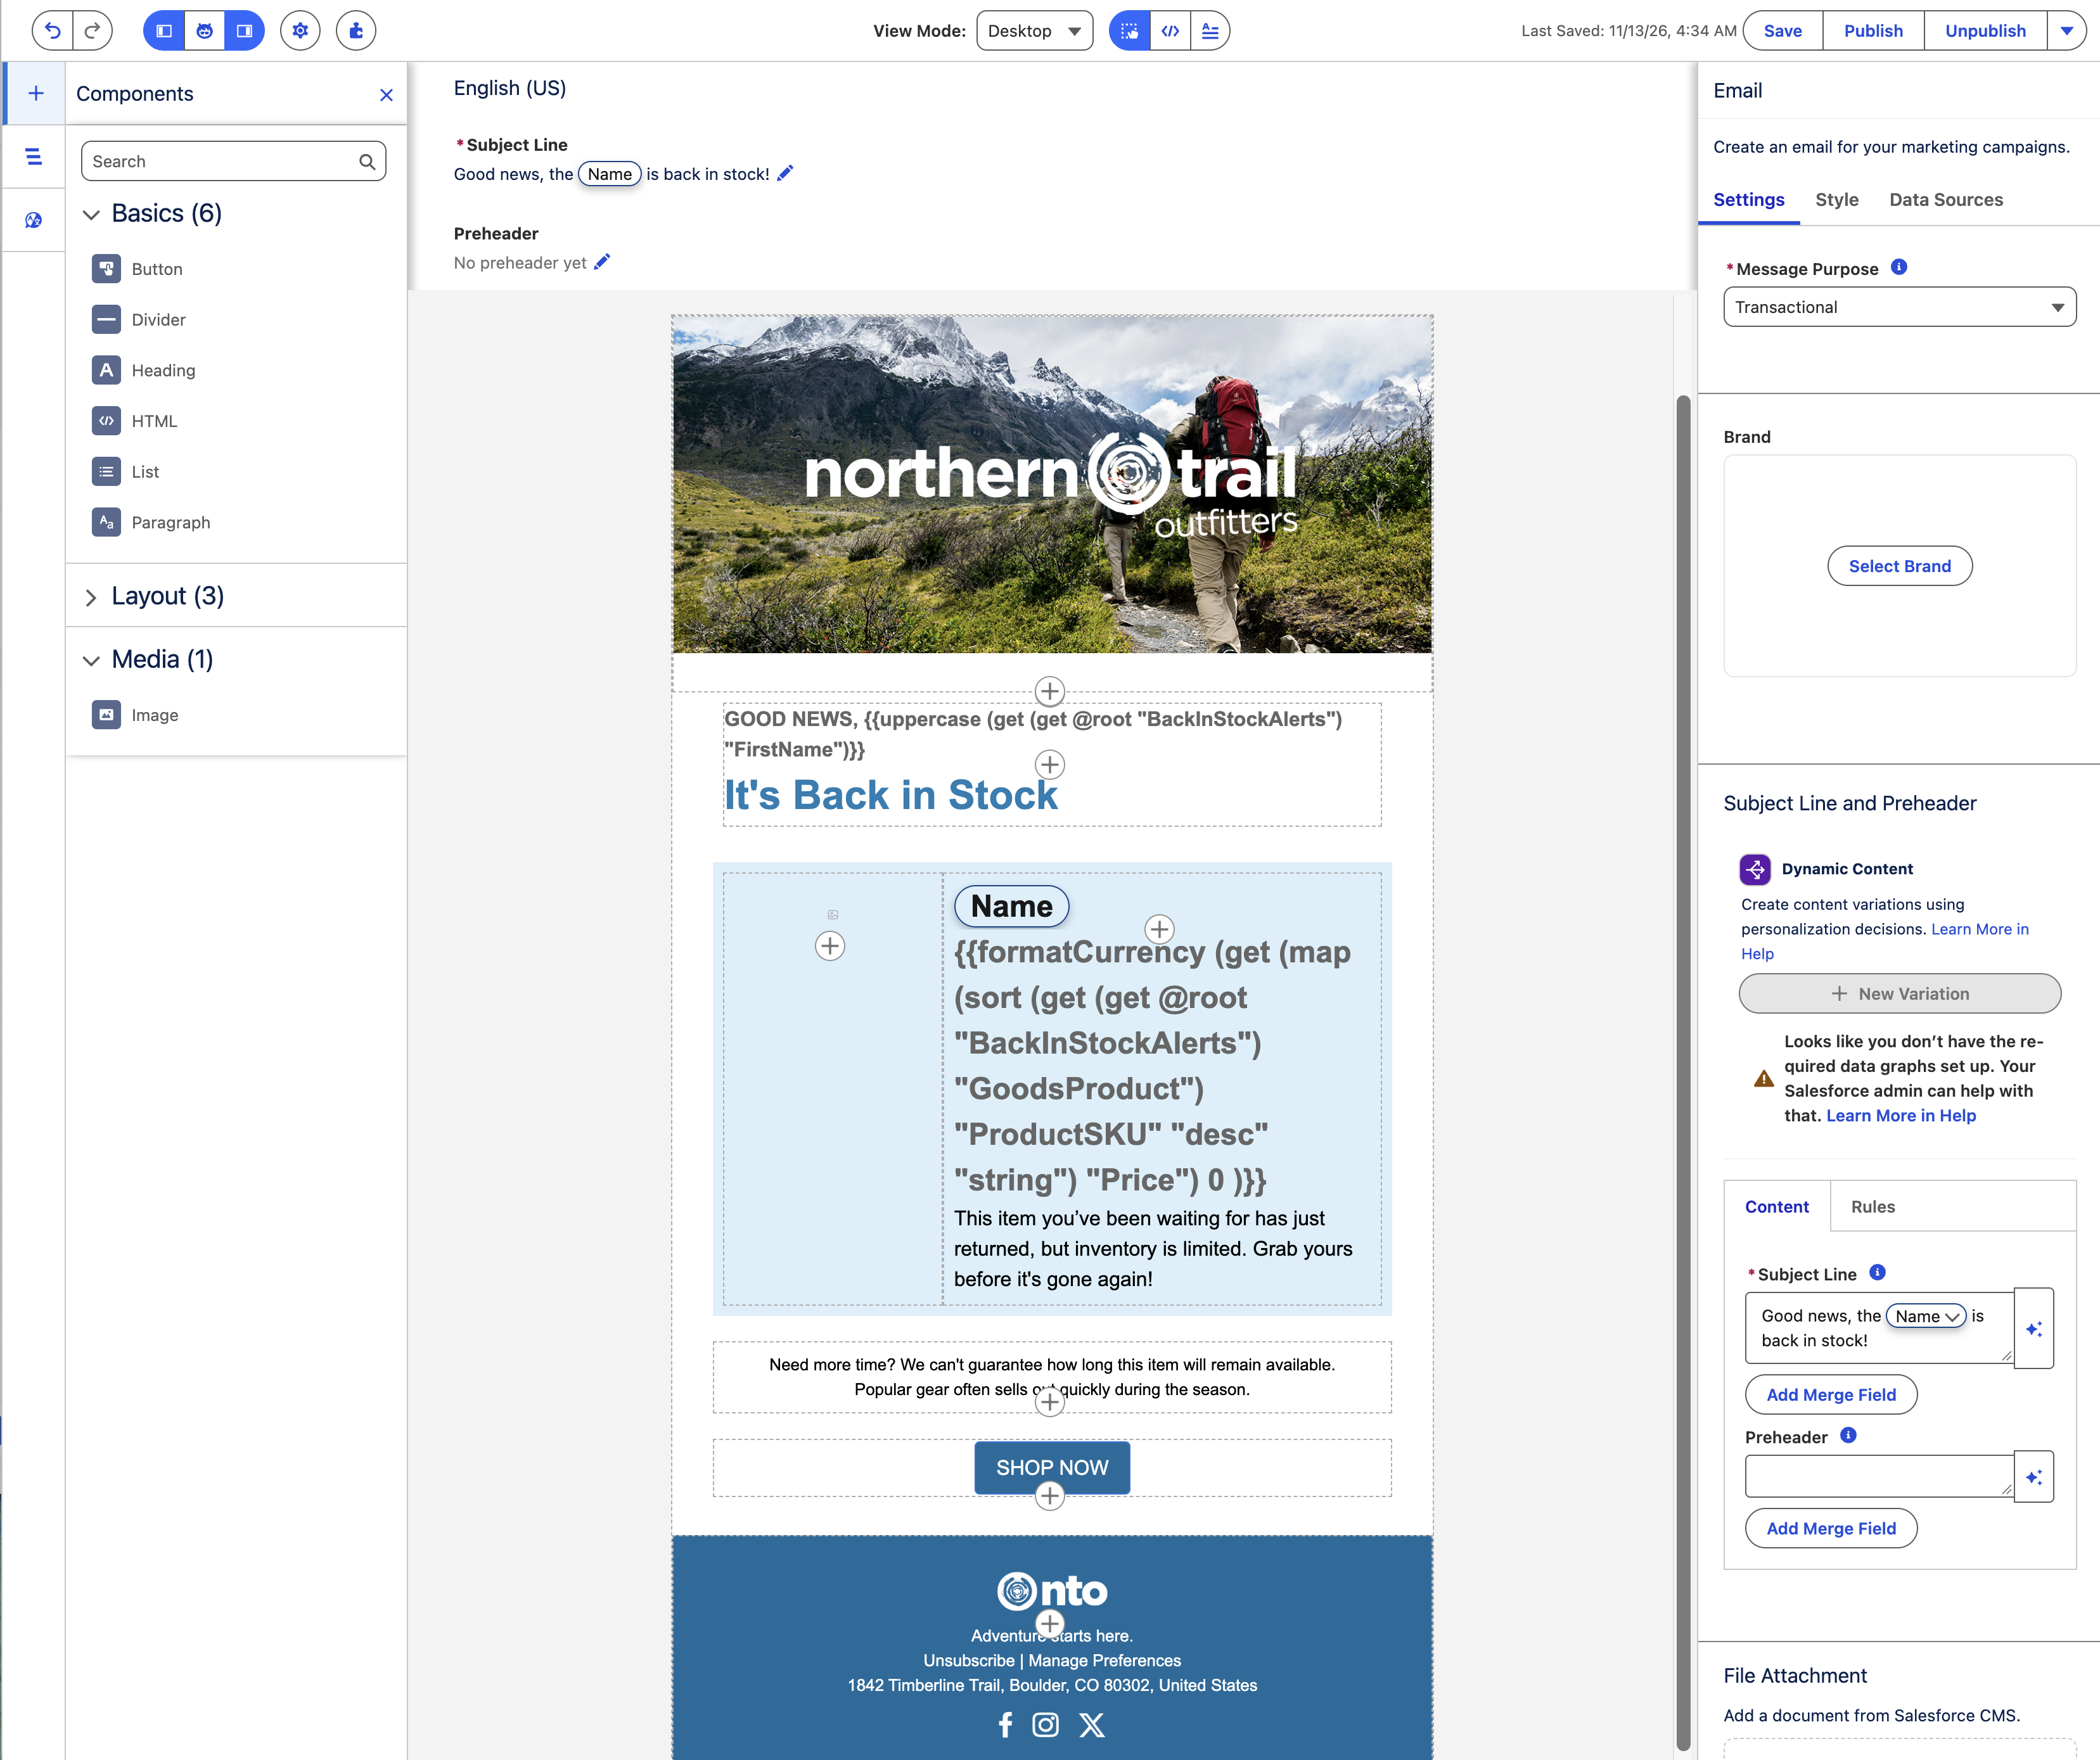
The imported email already includes Handlebars helper functions that retrieve and format values from the activation. In this exercise, you’ll complete the email personalization by adding two merge fields.
- Highlight and delete the Name placeholder text in the paragraph component. Click on the merge field icon
and select Activation Data Provider > Related Objects > Goods Product > Name from the Triggers sub menu. - Click Next, then click Done.
Add Default Text
You can optionally add text that appears for the merge field if no attribute value is found. If you don't want default text to appear, leave the field blank.
- Select the image component (in the section with the blue background), then click the Merge field option from Select image source.
- Click Add Merge Field below the Source field, then select Activation Data Provider > Related Objects > Goods Product > Image URL from the Triggers sub menu.
- Click Next, then click Done.
- Select the SHOP NOW button component, then click Configure Action.
- Select Link to Dynamic URL from the Button Action menu.
- Click Add Merge Field below the Source field, then select Activation Data Provider > Related Objects > Goods Product > Image URL from the Triggers sub menu.
- Click Add Merge Field below the Dynamic URL field, then select Activation Data Provider > Related Objects > Goods Product > Product URL from the Triggers sub menu.
- Click Next, then click Done.
- Click the pencil icon
under the Subject Line heading and in the active Subject Line field, update the value to: Good news, the {!$Expression.Name} is back in stock! - Click Publish, then click Next, and Publish Now.
- Click the back arrow
in the top left corner of the page to return to the content page.
Create Activation-Triggered Flow
- Click on the Flows tab.
- Click New.
- Click the Triggered Automations tile.
- Click the Activation-Triggered Flow tile.
- Click Next.
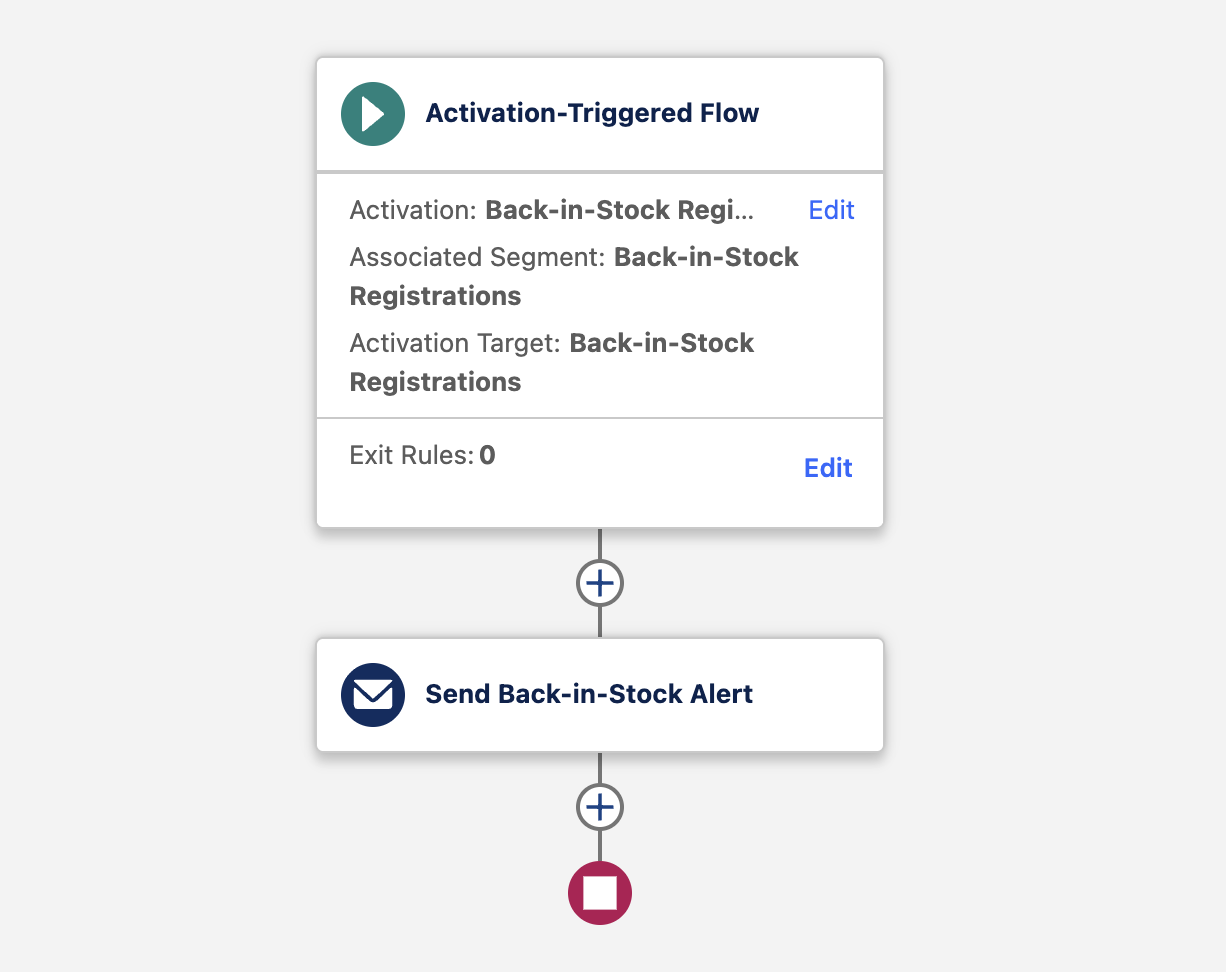
- Click the
Select Activation link in the flow start element. - Select Back-in-Stock Registrations from the Select Activation menu.
- Click the
icon under the start element. - Select Send Email Message.
- Enter
Send Back-in-Stock Alertin the Label field. - Click Select Email in the Select Email to Send section.
- Navigate to the Partner Workshops folder and select the Back-in-Stock email, then click Add.
- Scroll down in the Send Email Message panel and select an email from the From Name and Address menu.
- Click Save.
- Enter
Back-in-Stock Alertsin the Flow Label field. - Remove the data graph from the Data Graph field.
- Click Save.
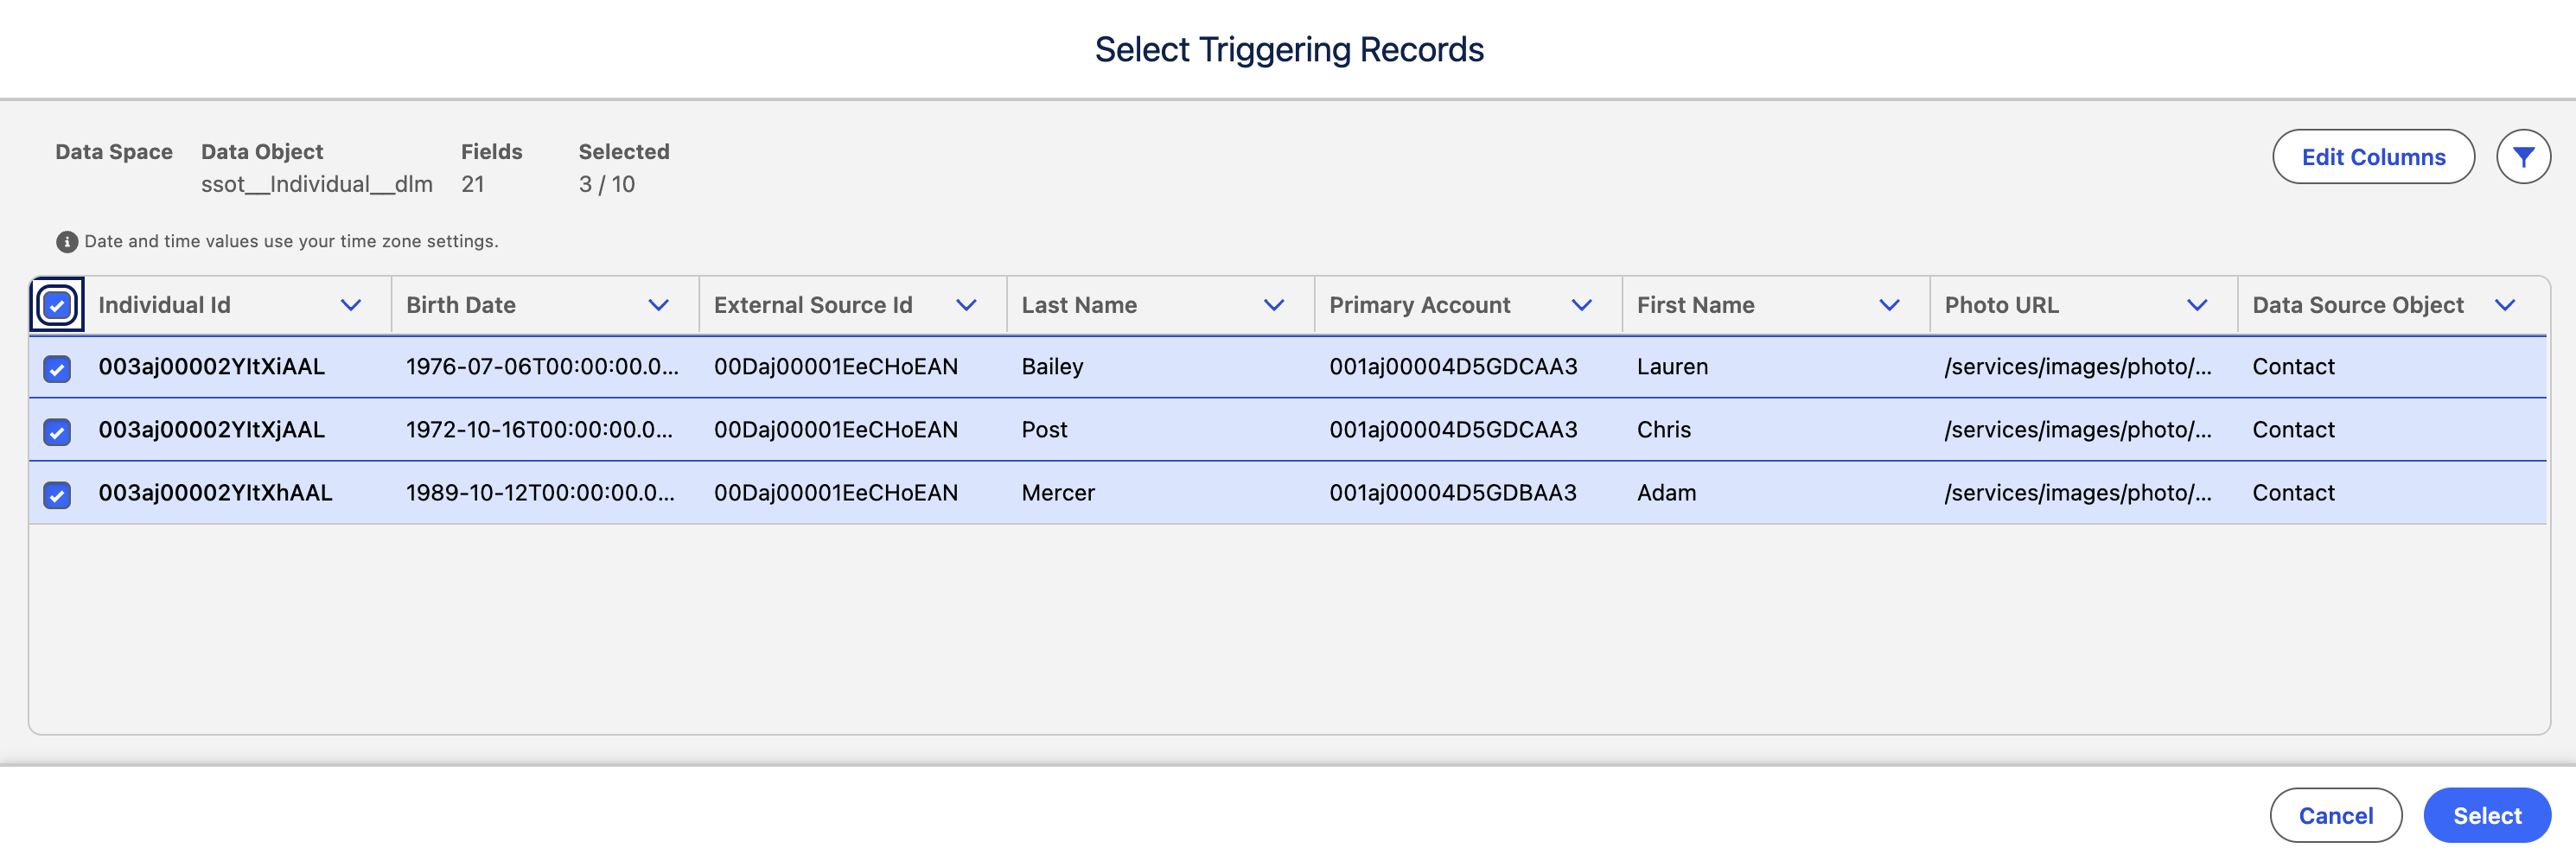
- Click Debug.
- Expand the Set Triggering Record section in the Debug panel.
- Click Select Records.
- Select all records, then click Select.
- Select the Send Email Message option in the Send Test Messages section, then click Run.
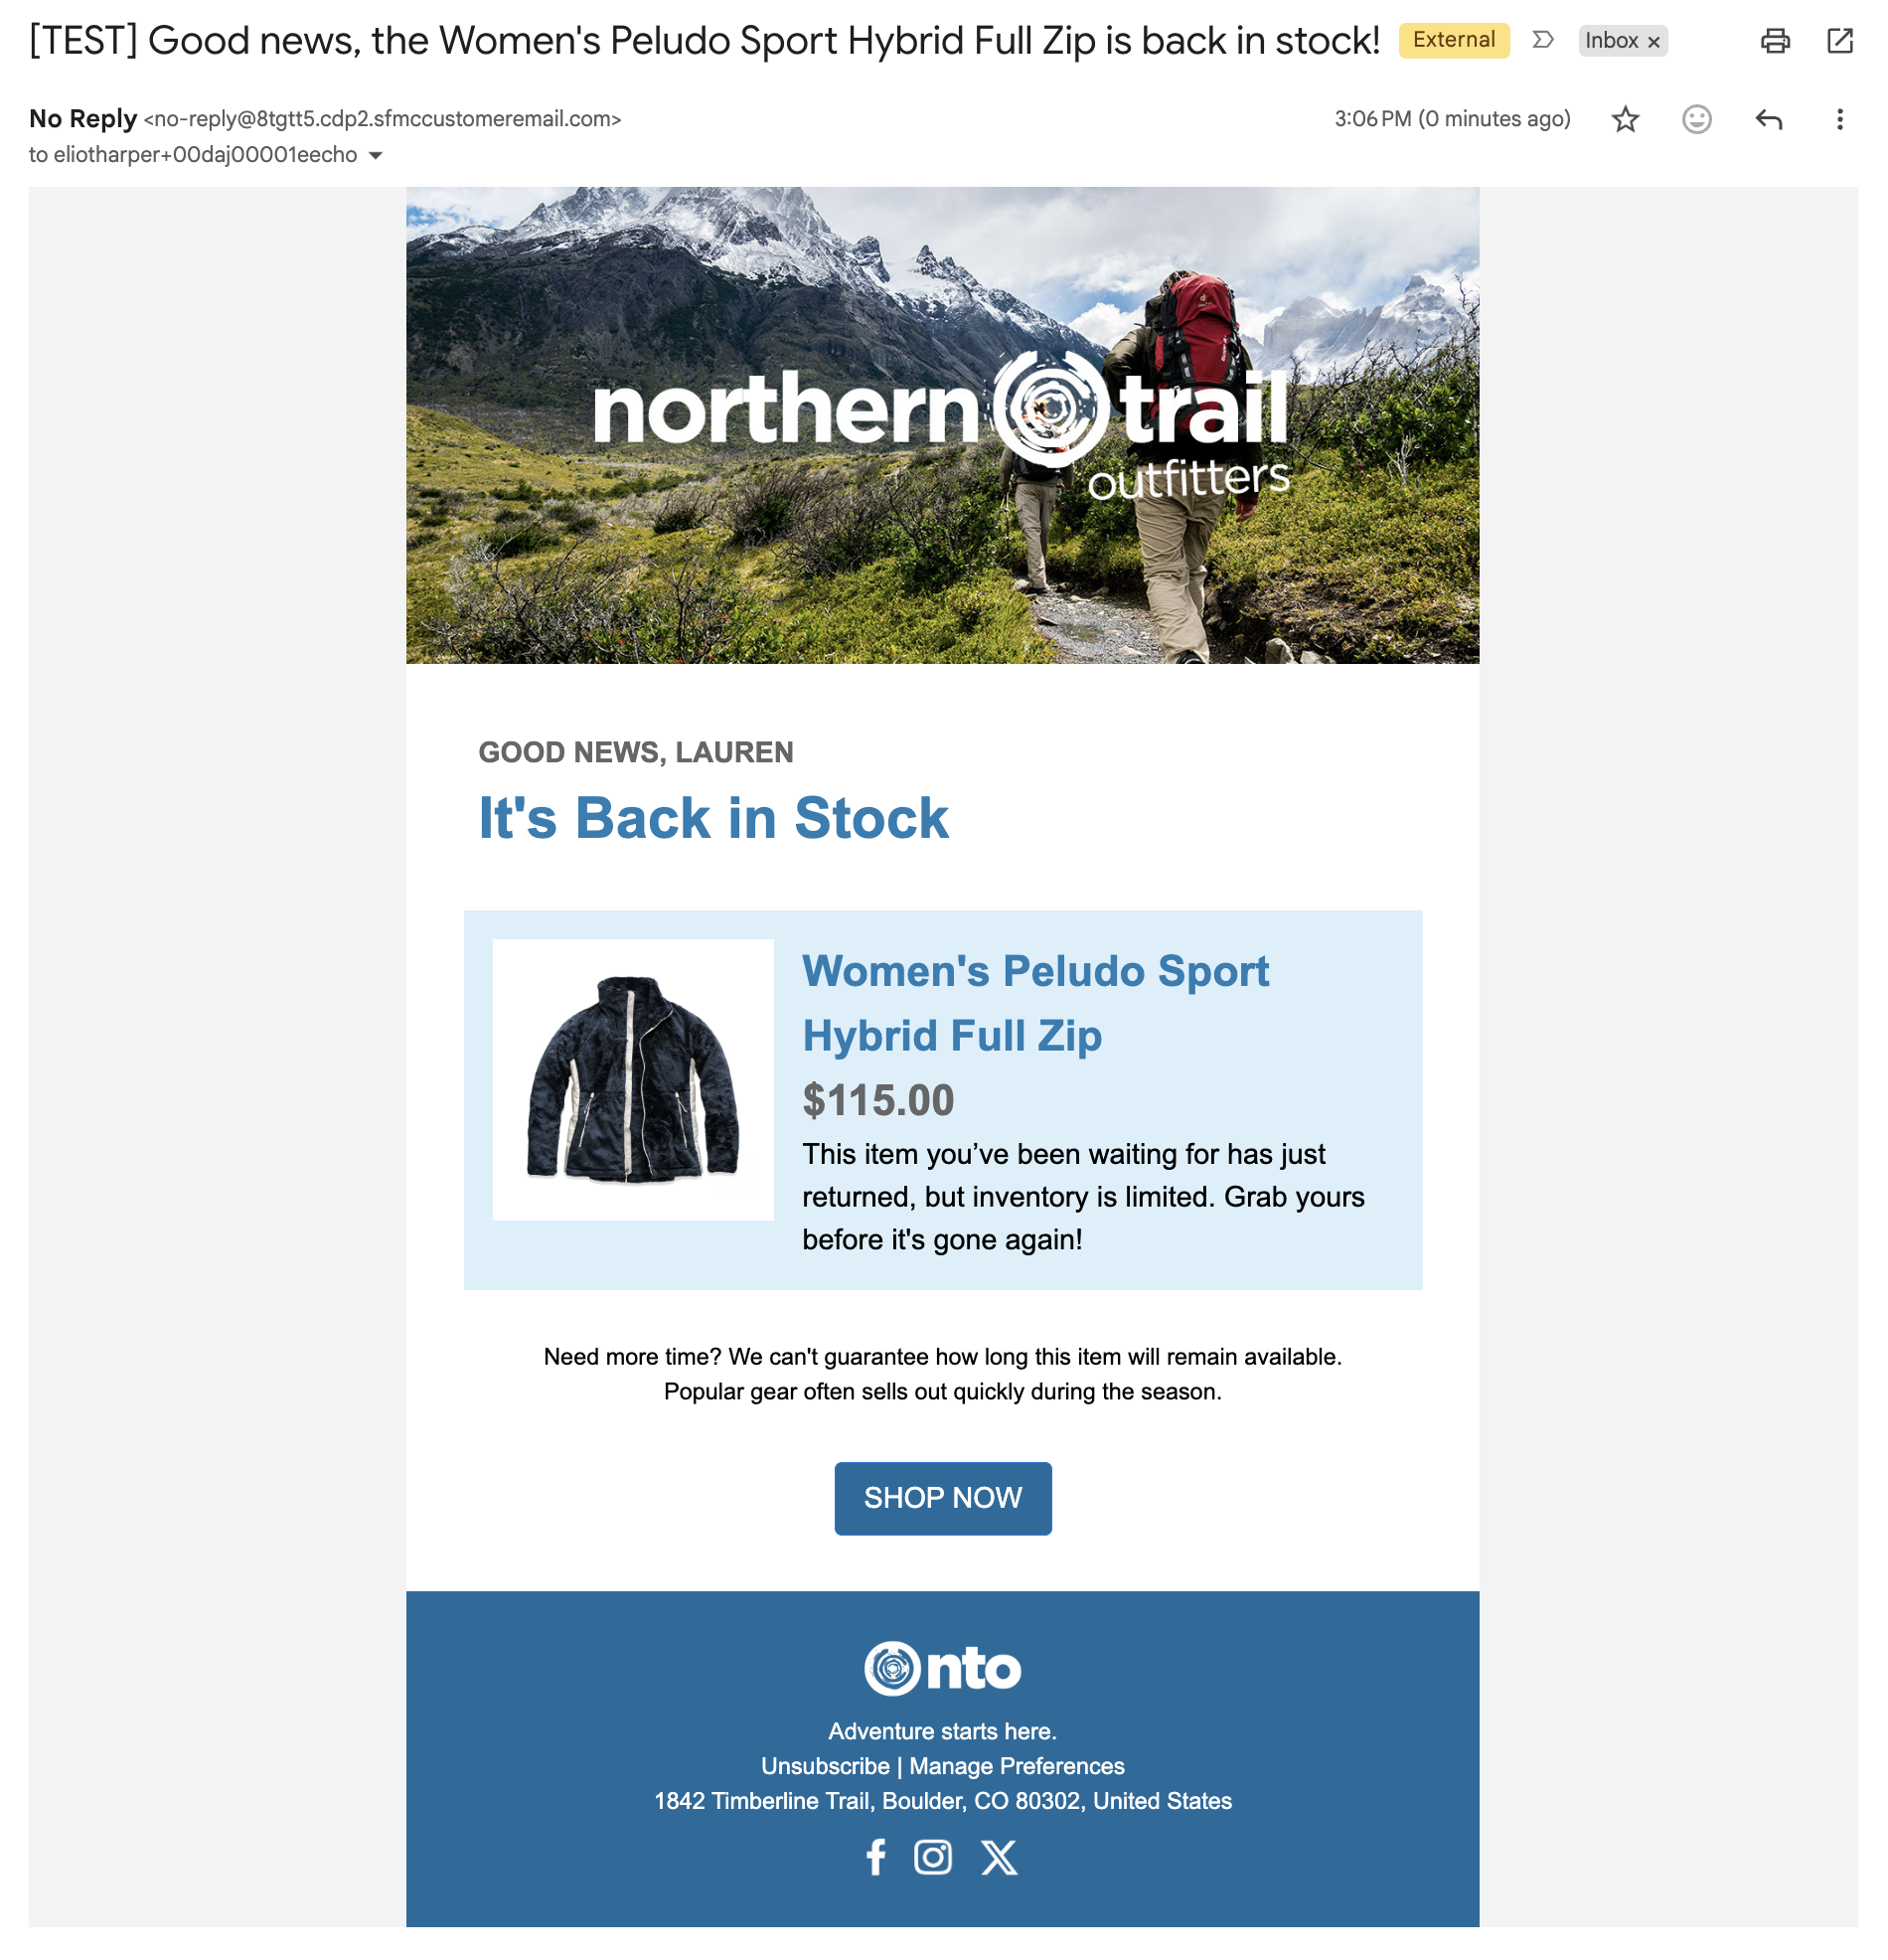
- Check your email inbox and verify that you’ve received all three test messages.